
Security while browsing the internet is important to block out viruses from unreliable websites. However, due to such high security, it limits certain functionalities from websites that you find trustworthy. If you think that a website can be trusted and you want to fully enjoy all its features, you can add it as a Trusted Site in Windows 10.
Your browser includes a list of Trusted Sites that becomes an exception to the security warnings. It means that while your browser still maintain a certain level of security from any other website, those included in the Trusted Site list are excluded from the security warnings and are fully functional in all features.
If you come across a reliable website you want to add to the exception list, here’s how you can do it in Windows 10.
Method 1 – Adding a Trusted Site in Microsoft Edge
Here’s how to add a trusted site in Microsoft Edge.
- First, open the control panel.
- Then, look for the Internet Options icon and double click to open. A pop up window will appear.
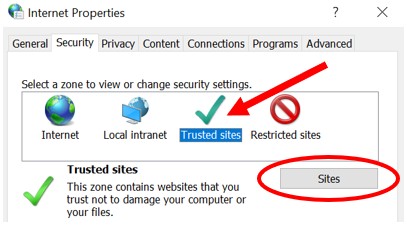
- Look for the Internet Properties and click on the Security tab.
- Here you will find the Trusted Sites entry. Select on the option and click on the Sites button.
- Now, copy paste the address of the website you want to add as Trusted Site in the “Add this website to the zone” text field.
- Click the Add button.
- Click OK to save the website and exit the Control Panel. Your website will automatically be excluded in the security warning.
Method 2 – Add a Trusted Site in Firefox
- Open your Firefox browser. Then, go to the Firefox menu.
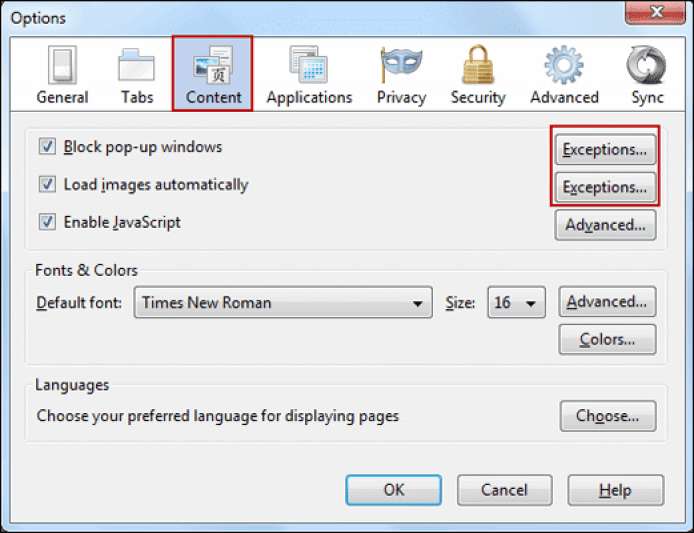
- Choose Tools and look for Options. Click to open.
- You will have different options to select for your exceptions. Click exceptions and add your desired URL to the following options:
- Block pop-up windows – exceptions from blocking pop-up windows
- Load images automatically – you have the option to allow or block the site from loading images automatically
- Enable JavaScript – allows JavaScript.
- Privacy – you can choose to allow or prevent cookies from different sites. To do so, click on clear all current history to open up the “Clear Recent History” window and choose your option
- Security – overrides the warning “Warn me when sites try to install add-ons” box even if the box is checked
- Exceptions – add the URL and click allow
- Advanced – if you want to override the warning “Tell me when a website asks to store data for offline use”, you can go to Network tab and modify.
Method 3 – Adding Trusted Site in Internet Explorer

- Open your Internet Explorer browser.
- At the top right corner, look for the gear button and click to open a drop-down menu.
- Choose Internet options. You will then see another menu.
- Select the Security tab.
- Look for the Trsuted Sites green tick and click to open.
- Click the Sites button.
- From there, you can enter the URL you want to add to the list of Trusted Sites. Avoid adding any sub-section to the site.
- Once done, click OK to apply the changes.
Method 4 – Add a Trusted Site in Google Chrome
- Open your Chrome browser.
- On the far right corner of the address bar, look for the three horizontal lines icon and click to open.
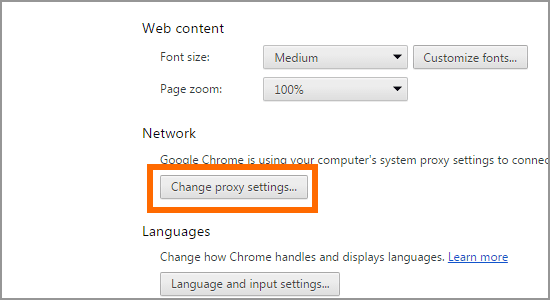
- Select Settings. Scroll to the bottom and when you find the Show Advanced Settings link, click to open.
- Choose Change proxy settings. Click the Security tab.
- Look for the Trusted Sites icon and choose Sites.
- You can now enter the URL.
- Click Add and then close the window. Click OK to save the URLs.
Method 5 – Add Trusted Site to Group Policy
There may be times when you have to add a trusted site to group policy and you have to do it manually. Follow the steps below to see how.
- Open the Run dialog by pressing the Windows+R key simultaneously.
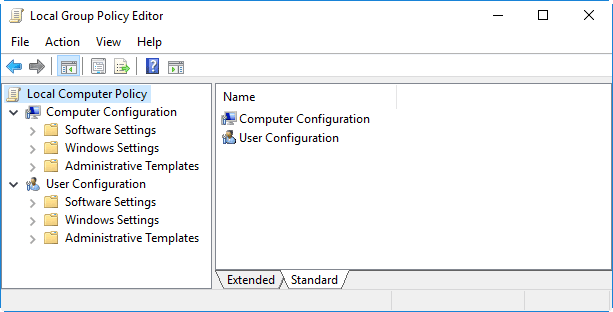
- Type gpedit.msc and click OK.
- Look for the Computer Configuration in the left section. Click to open and select Administrative Templates.
- Click on Windows Components and choose Internet Explorer.
- Navigate to Internet Control Panel and click on Security page.
- Now, choose Site to Zone Assignment List in the right side.
- Once inside the window, choose Enabled.
- Look for Options and under it, click on the Show button.
- You can now type in the address under the Value name column.
- In the box next to it, type 2.
- Click OK to save your changes.
Conclusion
Adding a website as Trusted Site will allow you to maximize the functionality of some websites. Check the methods above and tell us in the comment section if these solutions work for you.
None of the chrome directions seem up to date. At all