Windows has a very convenient feature called CHKDSK (Check Disk) that allows you to analyze disk failures and errors and will let you repair them automatically. This can save your life if you deal frequently with hard drive errors.
Breaking or damaging the hard drive can cause panic to anyone. The risk of losing files is painful, and hard drive failure is one of the most commonly reported errors on different versions of Windows PC.
We will explain how to run CHKDSK under Windows 10 in the next steps. Remember that the CHKDSK is not very useful if you are dealing with a physically damaged hard drive, but it can be a great tool for fixing bugs and help troubleshoot the real issue.
How CHKDSK Works
The CHKDSK does a number of functions depending on how it is run:
- The main function of Chkdsk is to check the integrity of the file system and file system metadata on the hard disk and correct any detected file system logical errors. Such errors may include corrupted entries in the Volume Master File (MFT) table, incorrect security descriptions associated with the files, or even time stamps or incorrectly matched file size data to individual files.
- In addition, Chkdsk can scan any sector of the hard disk to find damaged sectors. Bad sectors come in two forms:
- Soft bad sectors that can arise from poor writing of data.
- Hard bad sectors that can arise from physical damage to the hard drive.
- Chkdsk tries to solve these problems by repairing damaged areas and marking damaged areas so that they are not reused.
The Main Features of CHKDSK:
- scans/fixes NTFS/FAT hard disk drive errors.
- denotes bad sectors (physically damaged blocks)
- scans other storage media (USB storage devices, external SSD storage devices and SD cards) for errors.
CHKDSK Common Usage
The most common ways to use CHKDSK are as follows:
CHKDSK /F – to check and repair the current drive (may need to be restarted).
CHKDSK D : /F – Check and repair a specific drive (in this case D 🙂
CHKDSK D : /R – Check, repair and search for damaged sectors on a particular actuator.
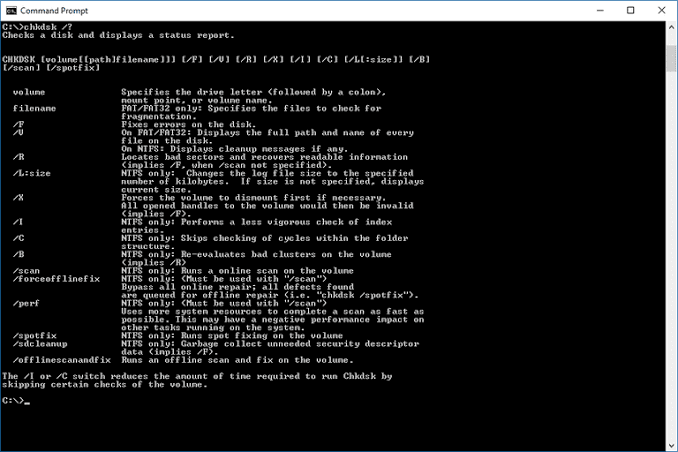
You can also start CHKDSK / ? to get a list of additional options.
CHKDSK Command Parameters
By default, CHKDSK works on the “current” drive, which in almost all cases will be C:. To have CHKDSK check another disk, simply run the CHKDSK command with a space and then the disk ID:
In order for CHKDSK to solve the problems found, you must insert the “/F” (Fix) parameter:
CHKDSK D : /F
This will allow you to check the D: drive; if errors are found, CHKDSK will try to fix them. The results will be transferred to the on-screen display.
Finally, the most common next step for CHKDSK is to search for defective sectors. This is the /R (Repair) option:
CHKDSK D : /R
When CHKDSK executes /R, it checks the entire surface of the disk for defective sectors and tries to recover or bypass the sectors found, if possible. Executing the /R command also leads to the /F command.
How to Perform a CHKDSK Check from Windows Explorer
The most obvious and easy way to perform CHKDSK on a disk is through the standard Windows Explorer user interface.
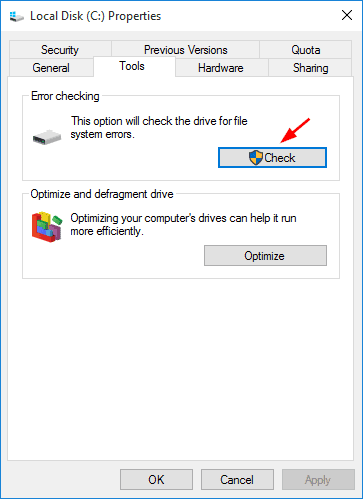
- Right-click the drive that you want to scan, and then select Properties. Click the Tools tab and click Check (now) in the Error Check section.
The type of pop-up depends on your operating system.- A small window will appear in Windows 7 with the “Automatically correct file system errors” option enabled. The longer the “Find and attempt to repair damaged sectors” option is, the more optional it is. To enable scanning and troubleshooting of your hard drive, simply click Start. If you are scanning and repairing a C drive, Windows should do so the next time it starts up, as it cannot fix errors while the drive is running. Click the Check Schedule Drive button when a pop-up window appears.
- Windows 8 and 10 have improved disk management, and drives are regularly scanned during routine maintenance, so in most cases they do not need to be scanned manually.
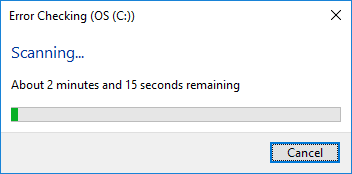
- You can still scan even if this means you don’t need it, just click the Scan Reader button. If errors are found, the system will tell you that there are errors that need to be corrected and you will need to restart if the corrections are made on the system’s C drive.
How to Run CHKDSK in Windows 10 from the Command Prompt
- Click the Windows + R buttons to open the Run dialog box.
- Enter the following text, and then press Enter.
- cmd
- Enter the drive letter you want to check (then a colon), and then press Enter. For example, enter the following text to test the D drive.
- d:
- Navigate to the root directory of the drive by typing the following text and pressing Enter.
- cd\
- Enter the following text, then press Enter.
- chkdsk / <switch> (where <switch> is one of the following)
- If you want to automatically fix file system errors, use the /f option (e.g. chkdsk /f).
- If you want to fix a file system error, find and recover the wrong sectors, use the /r option (e.g. chkdsk /r).
- If you do not specify the switch when you start CHKDSK, the detected errors will not be corrected.
- If you are prompted to run CHKDSK the next time you reboot your computer (since CHKDSK will not be able to get exclusive access to the disk in Windows), enter the following text, and then press Enter: y
- chkdsk / <switch> (where <switch> is one of the following)
- When prompted, enter the following text, then press Enter.
- exit
- If you need to plan the CHKDSK process, reboot the computer.
- When you boot up Windows CHKDSK, it should start automatically and check the drive specified above.
Using CHKDSK on Boot Drive
The boot disk is the partition on the hard disk from which the computer boots. Bootable partitions are special in many ways, and one of the features is that they require special treatment to be managed by CHKDSK.
CHKDSK must be able to block any boot disk being scanned, which means that it cannot check the system boot disk when the computer is in use. If your target drive is an external or internal hard drive that cannot be bootable, the CHKDSK process starts as soon as we enter the example command above.
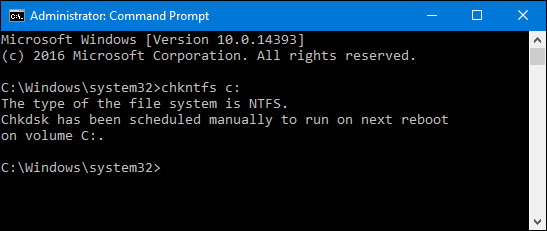
However, if the destination disk is a bootable disk, you will be asked if you want to run the command before the next boot. Enter “yes” (or “y”), reboot the computer, and the command will run before the operating system boots, giving it full access to the hard drive.
The CHKDSK command can be time consuming, especially when running on large disks.
However, once the file system check is complete, a summary of the results is displayed, including the total disk space, byte allocation, and most importantly, any errors found and corrected.