
Are you planning a group trip or constantly splitting bills with roommates? Keeping track of who owes what can quickly become a headache!
Luckily, Venmo Groups makes it super easy to manage shared expenses and bills within your circle of friends or household. This post will walk you through how to create a Group, track spending, split costs, and more.
How to Set up and Use Venmo Groups Bill-Splitting Feature to Help Manage, Track, Split or Settle Group Expenses and Bills Effectively
Step 1: Update to the Latest Venmo App
To access the newest features like Groups, you’ll want to upgrade your Venmo app to the latest version:
- Open your device’s App Store
- Go to the Venmo page and check the current version number at the top
- If an “Update” button is shown, tap it to upgrade to the latest release
- Once updated, open Venmo and you’ll have Groups access
Keeping the app updated ensures you get all the newest capabilities that help streamline sharing costs with others!
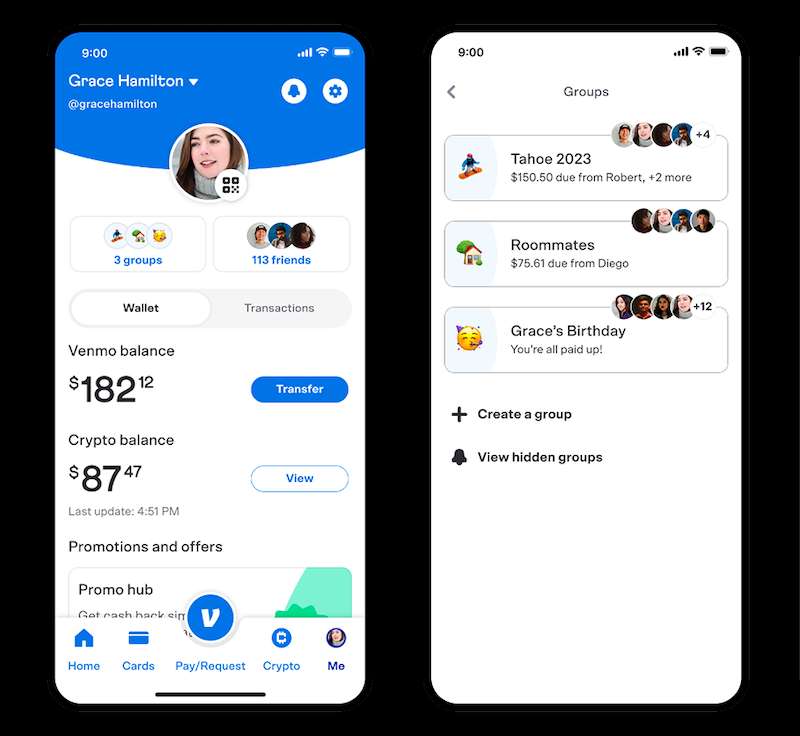
Step 2: Navigate to the “Groups” Section
Now that you have the newest Venmo app version, here is how to access Groups:
- Open your Venmo app and tap the profile icon
- This opens up your account page and settings
- Select the “Groups” tab at the top of the screen
- Tap the bright plus (+) icon to create a new group!
The Groups section is your headquarters for managing member expenses across all your shared circles.
Step 3: Set Up Your Group Details
After tapping the plus icon, Venmo will guide you through initial group setup:
- Enter a Group name and optional description
- Invite members by username (max 30 people)
- New members must accept request to join
Your group roster will build as members accept invites. Their pending status will show until confirmed.
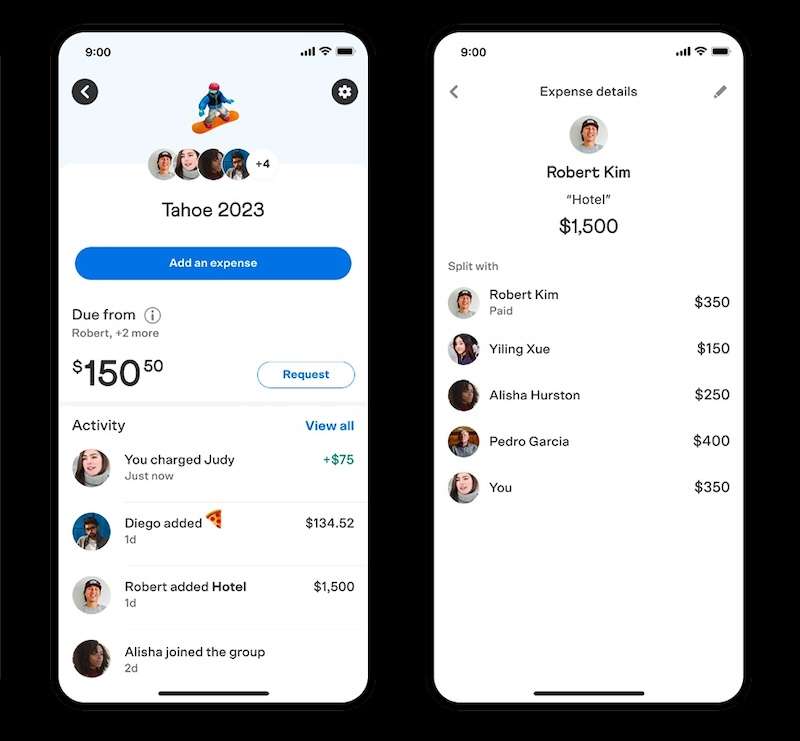
Step 4: Add Expenses Incurred Within the Group
Now the most useful part – tracking group spending!
Anytime a member pays for something shared, like a meal or travel fee, they can add the expense:
- Tap the new group from your list
- Select “Add an expense”
- Enter amount, what it was for, and who paid
- Mark or search for which members owe a share
The amount will evenly split between members automatically. Simple!
You can add endless expenses over time, like monthly wifi bills or a group gift. Super handy!
Step 5: View What You Owe and Get Paid Back
After group expenses get logged, you can view what you personally owe:
- Open the Venmo app to your account page
- Select the new “Groups” tab at the top
- See amounts you owe to other members
- Tap any expense line to pay your portion back
No more hassling people to get your cut or remember who paid last time! All shared costs get tracked and split in the Group overview.
Additional Tips for Managing Group Expenses Efficiently and Easily
Here are some extra tips for utilizing Venmo Groups effectively as the organizer:
- Edit expense amounts or assigned members if adjustments needed
- Leave the group anytime by tapping the red minus (–) icon
- Appoint another trustworthy member as group owner
- Remove any inactive members as needed
- Balance privacy by toggling transaction visibility
I hope this breakdown makes it super clear. Say bye to endless IOUs and tricky calculations!