
Sending an email gets your messages across to your recipients in real-time. If you are in a rush to receive a response, an email will send it fast. To organize all your messages, you can use Microsoft Outlook as an email client.
It is one thing to deliver a message to your recipients. But, there is no assurance if they have read your emails or not. Waiting for a response can be frustrating. But, thinking if they have read it or not will add to the burden.
Using Microsoft Outlook will allow you to enable, add and request read receipts and delivery notifications, so you will know if your recipient has read the email or not. It is available on Outlook 365 web app as well as Outlook 2016, 2019, and 2020 app versions.
Difference Between Delivery Receipt and Read Receipt on Microsoft Outlook

You may have encountered another feature called Delivery Receipt. When you turn on the Delivery Receipt, you will get a notification that the delivery of your email has reached your recipient’s mailbox. But, enabling the Read Receipt will also notify you if your recipient opened the message.
You can turn on both receipts or choose only one depending on your need and preference. If it is important for you to know that your recipients are reading the message, try the Read Receipts.
How to Turn On Read Receipts on Microsoft Outlook
Note that Read Receipts are useful if the email client of your recipient also supports the feature. Otherwise, it will not notify you even if they have read your message.
- Launch your Microsoft Outlook.
- Click File.
- Go to Options.
- Select Mail.
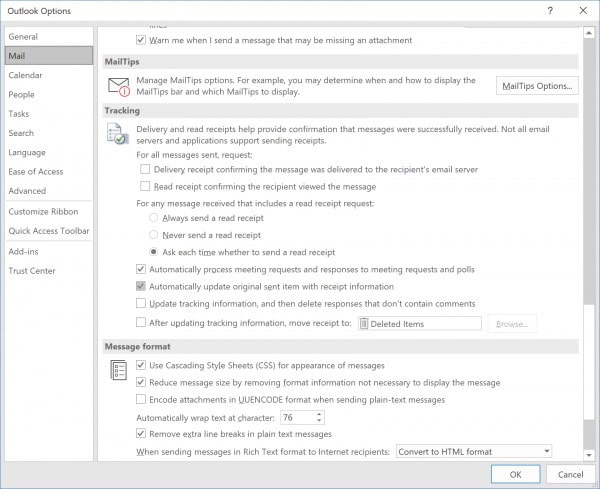
- Look for the Tracking section.
- If you want to enable the Delivery Receipts, check the box next to Delivery receipt confirming the message was delivered to the recipient’s e-mail server. For Read Receipts, check the box next to Read receipt confirming the recipient viewed the message.
- Click OK.
How to Add & Request Read Receipts on a Single Email
If you only need to activate Read Receipt on one message, you can do so.
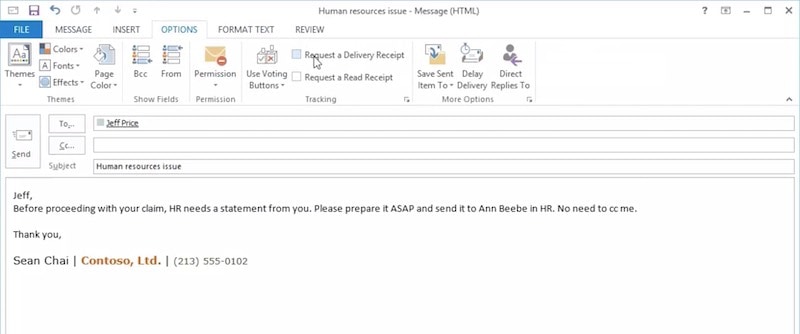
- On your Draft email or a new message, go to Options.
- Navigate to Tracking.
- Click Request a Delivery Receipt or Request a Read Receipt.
- Then, create your email or click Send.
- Another way is to click the three-dotted icons in your Draft email.
- Look for Message Options.
- Now, click Delivery Receipt or Read Receipt.
Do you want to turn on Read Receipts to all your sent emails or on selected messages only? You can tell us down below.