
Is your Windows 11 PC warning you of high memory or CPU usage? You may wonder how it can happen, especially if you use your usual apps. Unfortunately, many Windows 11 computer users reported that the new OS version of Windows consumes and uses a lot of your computer’s memory allocation.
However, there may also be other causes like running unnecessary apps in the background, possible malware infection, or not having enough RAM and CPU to power your needs. It can also lead to memory leak issues.
If you continue to experience an extremely high memory and CPU usage error on a normal basis, it can significantly affect the performance of your PC. You can try to troubleshoot it and have a better RAM management solution by following some of the methods below.
How to Troubleshoot and Fix High RAM or CPU Usage Issue on Windows 11 PC
Various methods can help you troubleshoot the error, resolve the high memory usage issue and free up some RAM on your Windows 11 PC. But, not all solutions apply to your situation since there can also be different causes of the problem. You can try each solution below one at a time and check if it fixes the error or not.
#1 – End Unnecessary Apps Running in the Background
You can check if there are memory-hogging apps that are not necessary and quit them.
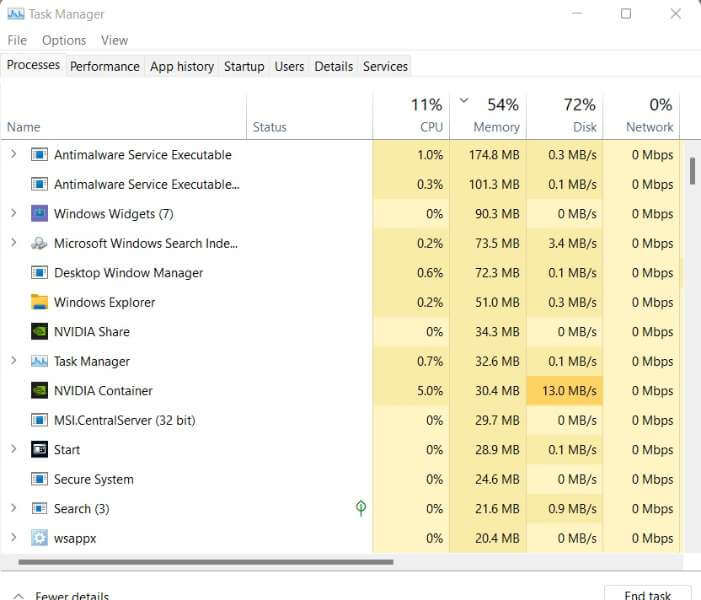
- Launch the Task Manager.
- Navigate to the Processes tab.
- Go to the Apps section.
- Look at each app and check their memory use under the Memory section.
- To quit these apps, highlight an unnecessary app and click End task.
#2 – Turn Off Superfetch/SysMain Service
- Open the Run Dialog Box. You can press Windows key+ R simultaneously.
- Enter services.msc.
- Scroll down and look for SysMain or Superfetch.
- Double-click to open it.
- Navigate to the Startup type and set it to Disabled.
- Under the Service Status, click the Stop button.
- Click Apply.
- Click OK.
- Reboot your PC.
#3 – Change your Virtual Memory
- Launch the Run Dialog box and enter sysdm.cpl.
- Navigate to the Advanced tab.
- Under Performance, click Settings.
- Navigate to the Advanced tab.
- Go to Virtual Memory and click Change.
- Look for the Automatically manage paging file size for all drives option and uncheck the box next to it.
- Click Custom Size.
- On the Initial Size (MB), enter the recommended size found at the bottom.
- On the Maximum Size (MB), multiply your RAM size to 1.5 and enter it on the field.
- Click Set.
- Click OK.
- Restart your PC.
#4 – Defragment and Optimize your Hard Drive
- On the Search box, enter defragment.
- Click Defragment and Optimize Drives on the search results.
- Highlight your hard drive and click the Optimize button.
- After finishing the defragment, click Change Settings.
- Look for the Run on a schedule (recommended)” checkbox option and uncheck the box.
- Click OK.
- Reboot your PC.
#5 – Turn Off Automatic Running of Apps During Startup
When you are not using your computer, there is zero memory use. However, it begins to use RAM when you open and use your PC. Allowing some programs to run automatically during startup will use more memory.
- On the Task Manager, navigate to the Startup tab.
- Look for the program you do not want to run during startup and highlight it.
- Click the Disable button.
#6 – Set your PC to Adjust for Best Performance
- On the Search box, enter sysdm.cpl.
- Select the System Properties Windows or the sysdm.cpl.
- Navigate to the Advanced tab.
- Go to Performance and select Settings.
- Under the Visual Effects tab, look for the Adjust for Best Performance.
- Check the box to select it.
- Click Apply.
- Click OK.
#7 – Scan your PC for Potential Malware
- Open the Windows Security settings. You can use the Search button or navigate to the Settings menu.
- Go to Virus & threat protection.
- Click the Quick scan button.
- Another option is to click Scan options.
- First, perform a Quick Scan.
- Then, do a Full Scan and follow instructions on the virus found.
What did you do to fix the high memory or CPU usage error on your Windows 11 computer? You can share your solutions with us below.