
A lot of people are using VPN today may it be for watching and streaming media or opening a few certain websites. VPN or the Virtual Private Network protects users from the potential risk of connecting to an untrusted site. It also secures your access to your accounts when you are using a public Internet connection.
VPNs are helpful when you want to use streaming services with geographical restrictions on their content. It bypasses these limitations and gives you access to more movies and shows. An example of a popular VPN service provider today is Nord VPN.
Why is My Nord VPN Not Connecting?
Some users reported that their Nord VPN is not connecting on their Windows 10 PC. One of the reasons may be due to an error in your network connection. It may also be an issue with the IPv6. Whatever is the cause of your Nord VPN not connecting issue on your PC, there are methods on how you can fix it.
How to Troubleshoot Issue and Fix Unable or Failed to Connect to NordVPN Servers on Windows 10
#1 – Reset the App
- Launch the Settings menu.
- Go to Advanced.
- Select the Run Diagnostics Tool.
- Click Reset App.
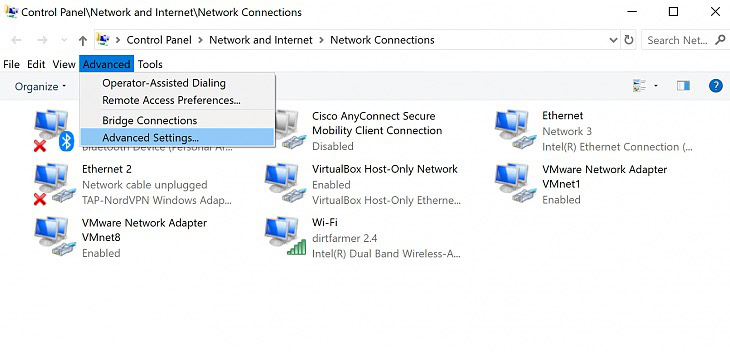
#2 – Restart the NordVPN TAP Adapters

- On your computer, go to the Control Panel.
- Click Network and Sharing Center.
- Select Change Adapter Settings.
- Look for the TAP-NordVPN Windows Adapter v9.
- Disable the adapter.
- Now, enable it again.
#3 – Disable the IPv6
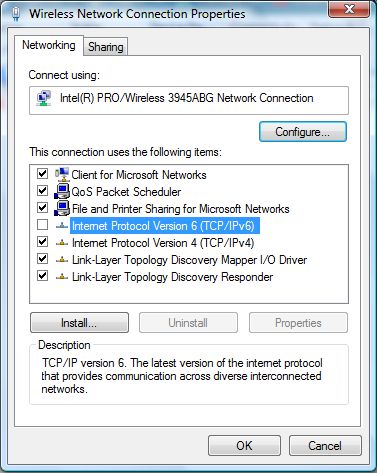
- Look for the Network icon on your taskbar.
- Right-click on the icon.
- Click Open Network and Internet Settings.
- Under Change Your Network Settings, select Change Adapter Options.
- Look for the adapter you are using and right-click on it.
- Select Properties.
- Look for the IPv6 (Internet Version Protocol 6). Uncheck the box.
- Click OK and exit.
- Restart your computer.
#4 – Check the Status of Your Account
Login to the Nord Account page and check your account status. Make sure it is active. If not, contact customer service for support.
#5 – Change the DNS Servers
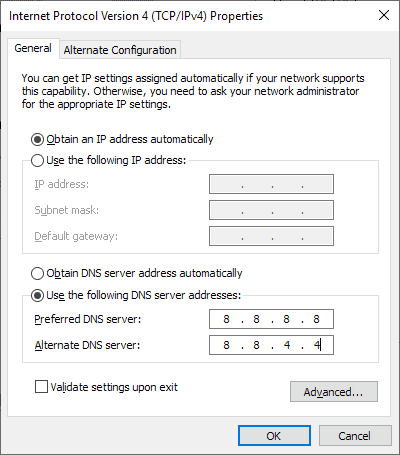
- Open the Nord VPN app.
- Click the Settings icon.
- Select Advanced.
- Go to the Custom DNS settings.
- Select Set DNS server address. Set it to 8.8.8.8.
- Select the Set DNS server address again. Now, set it to 8.8.4.4.
- Try reconnecting.
#6 – Change Adapter Settings
- Navigate to the Network and Sharing Center.
- Select Change Adapter Settings.
- Look for the TAP-NordVPN Windows Adapter. Right-click on it.
- Select Properties.
- Click TCP/IPv4.
- Select Properties.
- Go to the Advanced tab.
- Beside Automatic, uncheck the box.
- Look for the Interface metric and set it to 1.
Conclusion
If not one method from our list above worked for you, you can always contact the NordVPN customer support. They sure can help you with your concern in one way or the other.
Did the article help you? Tell us in the comments below.