
Staying current with system updates is crucial for both security and performance, yet sometimes, these updates can stall, leaving users in a bind. This can disrupt work and cause stress as we rely heavily on our technology to function correctly.
Understanding the root causes and solutions for such update issues is essential for maintaining a smooth experience with our devices.
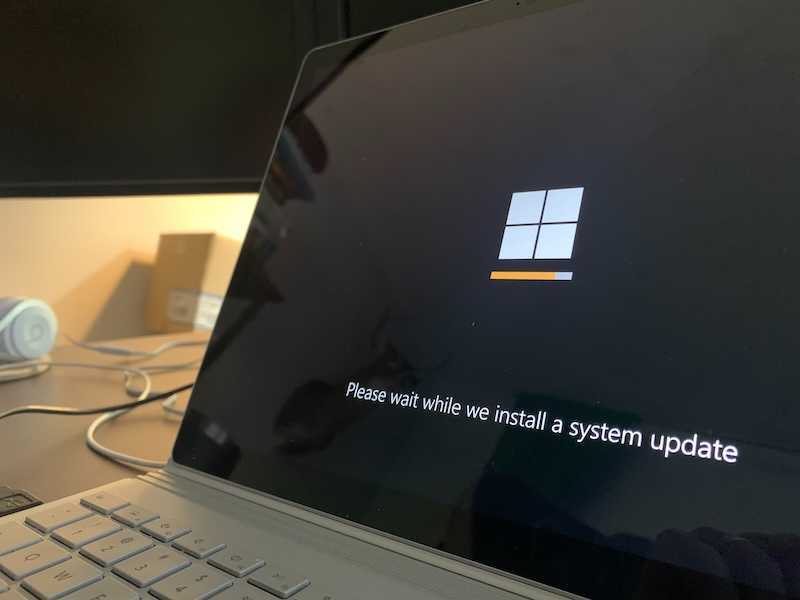
Resolving Windows PC Stuck on ‘Please wait while we install a system update’ Glitch
#1 – Wait for the Windows Update to Complete
Updates can be time-consuming, and it’s tempting to think something’s gone wrong when it’s just taking a bit longer than usual. Your computer is working on bringing in new features, fixing bugs, and enhancing security.
It’s a bit like waiting in line; there’s a process, and it needs to run its course.
Interrupting this process can be tempting, especially if you need to use your computer urgently. However, stopping an update prematurely is risky.
It’s similar to turning off the oven before a cake is fully baked; you won’t get the desired result, and you might not be able to salvage what’s left.
If you stop an update in the middle, it might not only halt the current improvements but also damage the existing system files. This could leave your computer in a state where it might not start up properly, or some programs might not work as they should.
It’s best to wait it out, even if it seems to be taking a long time.
In the rare case that an update is genuinely stuck, there are safer ways to handle it than a forceful shutdown.
For instance, there are built-in troubleshooting tools that can help. These tools are designed to fix update issues without risking the integrity of your system.
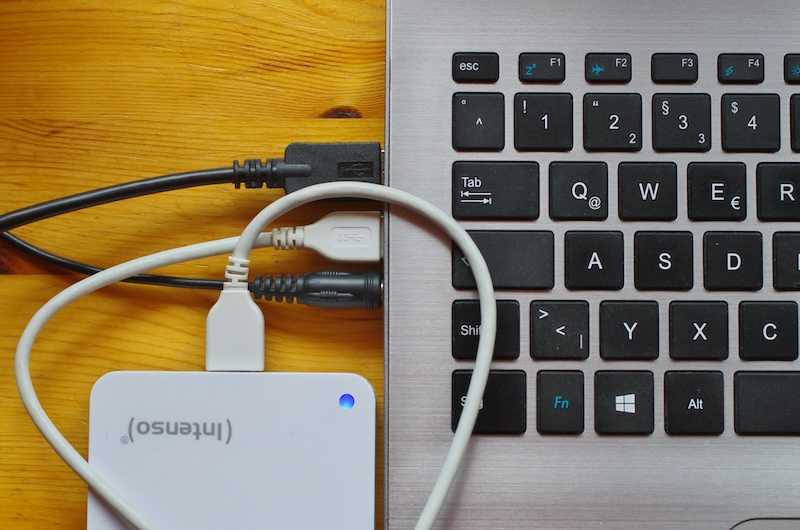
#2 – Unplug External Devices on your Windows PC
External devices connected to your computer can sometimes interfere with system updates. These devices include USB drives, external hard drives, printers, or even a mouse and keyboard. They might cause conflicts that prevent updates from being installed correctly.
- To safely remove these devices, you should first shut down your computer.
- Then, unplug any non-essential external devices. This does not include your monitor, if you’re using a desktop computer, but it does include everything else that’s not required for the computer to run.
- Once you’ve unplugged these items, turn your computer back on.
- If it starts normally, try running the update again. Removing these devices simplifies the system and can eliminate the sources of the update issue.
#3 – Force Restart Your Windows PC

A force restart can sometimes resolve issues if your computer is unresponsive. It’s a way to reboot your system when the usual restart option isn’t working. Here’s how you can do it:
- Hold down the power button for about 10 seconds until the device shuts off.
- Wait a few seconds after your device has completely turned off.
- Press the power button once more to turn your device back on.
Consider using this method if your computer has been stuck on the same screen for a long time without any changes. It’s a useful step before trying more advanced troubleshooting methods. Remember, this is a bit like a hard reset, so use it sparingly and only when necessary.
#4 – Check Windows Update History
Understanding what updates have been installed on your computer can be quite revealing, especially if you’re troubleshooting. Windows keeps a log of the updates it installs, which can be a goldmine of information when something goes wrong.
- To take a peek at your update history, you’ll want to head into the Settings menu.
- From there, navigate to the ‘Update & Security’ section and click on ‘View your update history.’
- This will show you a list of updates, both successful and unsuccessful ones.
Seeing failed updates can clue you in on potential problems. It’s like a breadcrumb trail leading back to the source of your current issue. If you notice a particular update that keeps failing, it might be the culprit causing your system to hang.
#5 – Boot into Windows Recovery Environment
Getting into the Windows Recovery Environment can help fix issues that prevent your computer from running properly. It’s a special mode that allows you to repair your system without starting the usual Windows interface. To access this environment, follow these steps:
- Start your computer and as soon as the Windows logo appears, press and hold the power button until the computer turns off.
- Turn your computer on and off again two more times. On the third restart, Windows should enter the Recovery Environment automatically.
- If the automatic method doesn’t work, you can also access it from the settings menu. Go to Settings, then Update & Security, and under the Recovery tab, you’ll find the option to restart now under Advanced Startup.
Using the Windows Recovery Environment is beneficial because it provides tools to fix common problems without needing additional software. It’s like having a built-in toolkit for your computer.
From here, you can perform tasks like restoring your system to an earlier state, repairing startup issues, or resetting your PC to its default settings.
#6 – Use the Reset Hole (For Specific Lenovo Models)
Certain Lenovo laptops come with a small, pinhole-sized button that’s a reset button. This reset hole is a special button used to reboot the device without needing to power it on in the usual way. It’s particularly handy if your laptop is unresponsive and the power button isn’t helping.
- To use the reset hole, you’ll need a straightened paper clip or a similar small, pointed object.
- With the laptop turned off, gently insert the paper clip into the hole and press down for about 10 seconds.
- This action should reset the system and clear any issues that were preventing it from booting up normally.
It’s a good idea to use the reset hole as a troubleshooting step before taking more drastic measures. You should consider this option if your laptop is stuck and not responding to the power button or keyboard commands.
Remember, this is for when the laptop is truly unresponsive and not just slow or lagging.
#7 – Run the Windows Troubleshooter
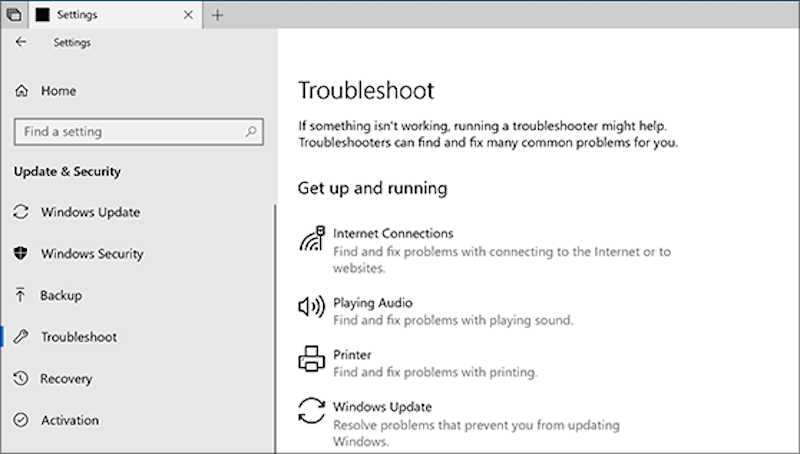
The built-in Windows Troubleshooter is a handy tool that can automatically fix some common problems with your PC. It’s like having a friendly technician inside your computer, ready to sort out issues with minimal fuss.
To get the troubleshooter up and running, follow these steps:
- Open the ‘Settings’ app by clicking on the Start menu and selecting the gear icon.
- In the ‘Settings’ menu, find and select ‘Update & Security’.
- Look for the ‘Troubleshoot’ option on the left-hand side and click on it.
- Here, you’ll see a list of different troubleshooters for various components of your system. Choose the one that’s relevant to your issue.
- Click ‘Run the troubleshooter’ and follow the on-screen instructions to let it work its magic.
Using the troubleshooter can save you a lot of time and effort. It’s designed to diagnose and resolve issues automatically, which is perfect for those who may not feel comfortable diving into more advanced troubleshooting techniques.
#8 – Test the Hard Drive on your Windows PC
The health of your hard drive is vital to the well-being of your computer. It’s where all your data is stored, and if it’s in bad shape, you could be looking at everything from slow performance to total system failure.
To check the health of your hard drive using HP PC Hardware Diagnostics UEFI, you should follow these steps:
- Power off your computer.
- Turn it on and immediately press the Esc key repeatedly, about once every second, until the Startup Menu opens.
- Press F2 to select System Diagnostics. The HP PC Hardware Diagnostics UEFI screen will appear.
- Click on “Component Tests,” then select “Hard Drive,” and then “Quick Test.”
- Click “Run once.” The Hard Drive Quick Test begins. If the Quick Test does not find a problem, run the Extensive Test which also checks the hard drive for all the necessary parameters.
These diagnostics are designed to test and ensure your hard drive is functioning correctly. If any issues are found, you may need to consider backing up your data and preparing for a potential replacement of the hard drive.
#9 – Try Updating Windows PC in Safe Mode
Safe Mode is a special way for Windows to load when there is a system-critical problem that interferes with the normal operation of Windows. Think of it as a minimal version of your operating system. It’s designed to start Windows with only the bare essentials, which can be very useful if you’re having trouble with updates.
Starting your computer in Safe Mode is a common step in troubleshooting. It can help you narrow down the cause of a problem. If an update works in Safe Mode but not in normal mode, it suggests the issue is with a third-party program or service that isn’t running in Safe Mode.
- To use Safe Mode for updating, restart your computer and press the F8 key as it’s booting up.
- This will bring up the Advanced Boot Options menu, where you can select Safe Mode.
- Once you’re in Safe Mode, try running your updates.
- Without the interference of extra programs and services, the update process may go more smoothly.
#10 – Recover the BIOS using Key Press Combination on Windows PC
The BIOS (Basic Input/Output System) is a crucial component of your computer that initializes the hardware during the boot-up process. Sometimes, due to various reasons like a failed update or malware, the BIOS can get corrupted.
When this happens, your computer might not start up properly, or it might not start at all.
Recovering the BIOS can often be done using a specific key press combination. This method is a way to bypass the usual boot process and access the BIOS directly to restore it to a working state. Here’s how you can do it:
- Turn off your computer completely.
- Press and hold the designated BIOS recovery key combination. This can vary depending on the manufacturer, but common combinations include “Ctrl + Esc” or “Ctrl + F10”.
- While holding the key combination, turn on the computer.
- Continue holding the keys until the BIOS recovery process starts.
Once you’ve initiated the BIOS recovery, follow any on-screen instructions to complete the process. It’s essential to ensure that the computer remains powered on during this time to avoid further complications.
After the recovery is complete, your computer should be able to boot up normally. If you’re unsure about the specific key combination for your device, it’s a good idea to consult the user manual or the manufacturer’s website.
#11 – Use Windows Startup Repair
Startup Repair is a Windows recovery tool that can fix certain system problems that might prevent Windows from starting. It’s a good first step when you’re dealing with startup issues, as it’s designed to be quick and easy to use.
- Begin by ensuring your computer is off. Then, turn on your device and press the F8 key repeatedly until you see the Advanced Boot Options menu.
- In the Advanced Boot Options menu, use the arrow keys to highlight ‘Repair your computer’ and press Enter.
- You may be prompted to select a keyboard layout and enter your password to continue.
- Look for and select ‘Startup Repair’ from the System Recovery Options menu.
- The tool will then scan your system for problems and attempt to fix any issues that are preventing Windows from starting.
Using Startup Repair doesn’t require a lot of technical know-how and can be a lifesaver when it comes to resolving issues that are stopping your computer from booting up properly.
#12 – Consider a Clean Install of Windows
Deciding to perform a clean install of Windows is a significant step. It’s like starting from scratch, giving your computer a fresh beginning. This method is often considered when your system is sluggish, infected with malware that can’t be removed, or if you’re selling your computer and want to wipe your personal data.
Before you proceed, it’s crucial to back up all your important files. You can use an external hard drive, a cloud storage service, or any other secure backup method. Ensure that all your documents, photos, and other personal data are safely stored away from the computer.
You’ll also need to ensure you have access to the installation media for Windows, which could be a USB drive or a DVD. Plus, keep a list of necessary software and product keys handy, as you’ll need to reinstall them after the clean install.
A clean install will erase everything on your hard drive. So, double-check your backups and ensure you’re ready to commit to this process. After the clean install, you’ll have a system that’s often more responsive and free of the issues that prompted the decision to start anew.
To Sum It All Up
If you’ve tried all the suggested steps and your PC is still stuck on ‘Please wait while we install a system update,’ it may be time to reach out for more help.
Contacting the manufacturer or an authorized service provider could provide additional support. They have the expertise to diagnose deeper issues and offer solutions tailored to your situation.