
With how the internet has become ubiquitous in modern life, it’s no surprise that VPNs have also gained a significant amount of popularity along with this. After all, nobody likes to be controlled on the internet, and many people value their security and safety online. Cybercrime runs rampant nowadays, and it’s just a common instinct to want to keep yourself away from all of it.
But, when it comes to troubleshooting VPN issues, things can often be somewhat difficult to truly parse. After all, a VPN is a complex tool that has many moving parts, communicating with your PC and then simulating a connection from another location to dupe websites into believing you’re from somewhere else. That’s where we come in to help.

Today, we’ll be addressing how to fix VPN error codes 809, 619, or 87 on Windows 10 and 11 PCs. We’ve created detailed step-by-step guides below for you to read, which should help you troubleshoot and solve your Windows computer VPN problem without too much hassle. So, let’s get right into it!
How to Troubleshoot VPN Connection Error 809, 619 or 87 on Windows 10 or 11 PC
Most of the time, the main reason these VPN error messages come up is due to Windows itself rejecting the connection. Sometimes this can be caused by your PC’s natural firewall blocking the connection. One of these error messages will appear on your screen when the error hits:
“Disconnected. Error 619: A connection to the remote computer could not be established, so the port used for this connection was closed.”
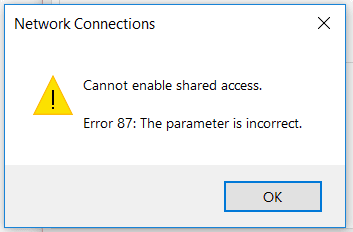
“Cannot enable shared access. Error 87: The parameter is incorrect.”
“An error is preventing the VPN from connecting. Reference error ID 809”

Regardless, just follow our guides and you’ll be good to go fixing the VPN errors 809, 619, and 87 on your Windows PC.
1: Allow VPN Through Your Firewall
- Go into your Control Panel.
- Search for Windows Defender Firewall.
- Select “Allow apps to communicate through Windows Defender Firewall.”
- Click on “Change settings” and provide Windows with admin access.
- Search for your VPN provider.
- Allow access through your firewall.
- Try your VPN again.
2: Open a Firewall Port Using Windows Defender Firewall
- Navigate to Windows Defender Firewall in the Control Panel.
- Select Advanced settings.
- Right-click Inbound Rules and select New Rule.
- Create a rule for ports.
- Select TCP, and in the box below write 1723.
- Allow the connection for all domain types, and then rename it to something you can remember.
- Repeat for UDP 500 and UDP 4500.
Wrapping Up!
If you’ve followed all the steps so far properly, then you should find yourself good to go! Your VPN should be working flawlessly, and your internet safety is ensured once again. We hope we managed to help you with your errors, and for more fixes and tips like these, stay tuned!