
Enhanced protection of your computer is crucial to prevent bugs and spyware from threatening your system. Windows 10 now includes an improved app to the Windows Defender Security Center. Windows Security is a safety dashboard that allow users to track the safety condition of their computer. Users can easily control their protection setting.
One of the features added to the Windows Security Center is the Tamper Protection. It blocks settings modified in the security center to avoid malware from making changes to it. These modifications to the security settings must be implemented via the Windows Security settings only.
What is Tamper Protection in Windows 10
Tamper Protection is a new feature for Windows Defender that offers added security through real-time protection and cloud-delivered protection.
While it is an important option in the Windows Security setting, users have a choice to enable or disable the feature. However, it is recommended to enable Tamper Protection to block malicious apps from making changes in your security settings. You will also know if your Tamper Protection is currently off. There is a yellow warning in your Windows Security app if it is turned off.
Users need to know that the Tamper Protection feature is only for the Windows Security settings. It will not protect other antivirus. You can check your antivirus if they have a similar feature as well.
How to Disable or Enable Tamper Protection
Via Registry Editor
- Open the Run box by pressing Windows+R.
- Type regedit followed by the Enter key.
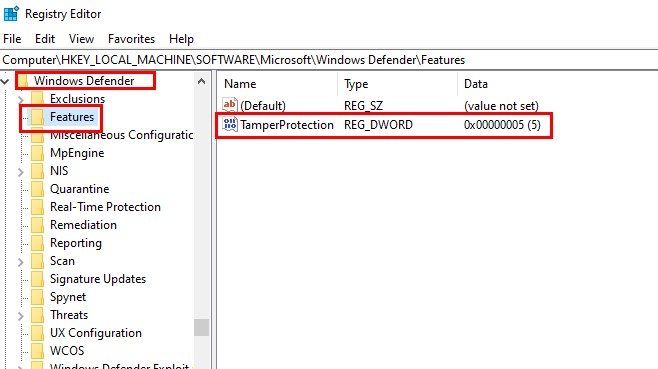
- Go to HKEY_LOCAL_MACHINE\SOFTWARE\Microsoft\Windows Defender\Features and look for the TamperProtection.
- Double click TamperProtection to open pop window.
- Edit the value data. To enable Tamper Protection, set the value to 5. To disable Tamper Protection, set the value to 0.
- Click OK to save changes.
Via Windows Security
- Click Start and look for the Windows Security. Click to open.
- Look for the Virus & threat protection and click to open.
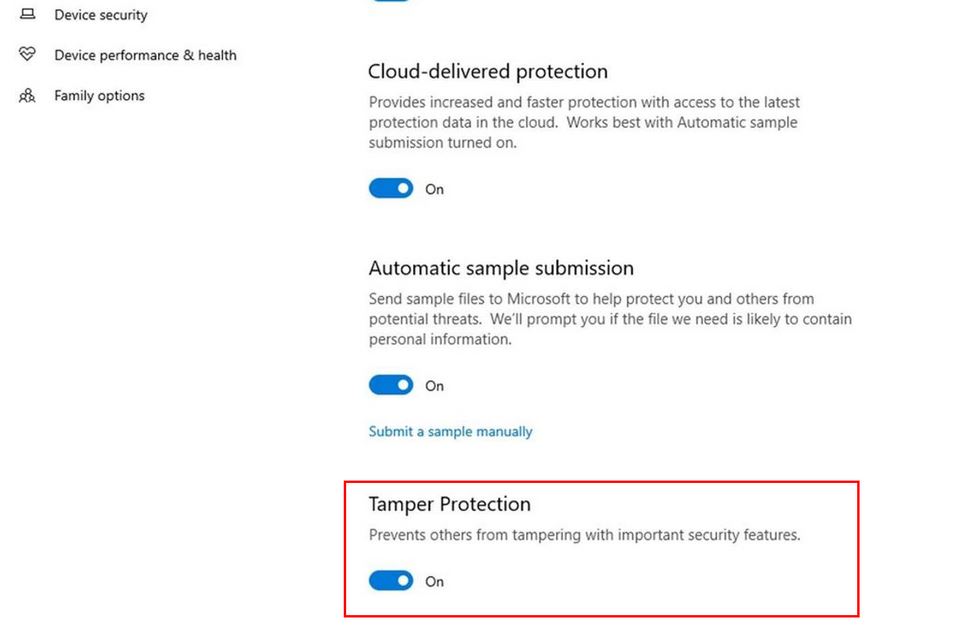
- Under the settings, click on Manager settings.
- Under Tamper Protection, toggle on or off to enable or disable the option.
Via Microsoft Intune
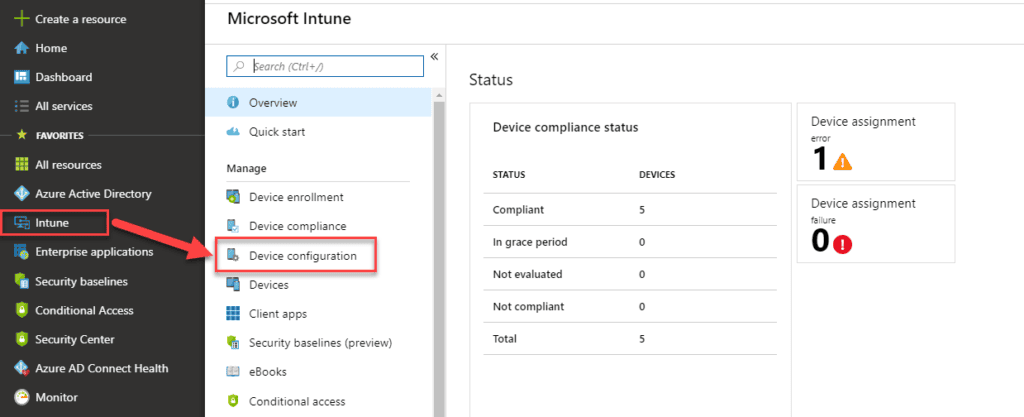
- Navigate to the Microsoft 365 Device Management portal and sign in your account.
- Choose Device configuration and under it, click on Profiles.
- You will then need to create a profile. For Platform, choose Windows 10 and later. For the ProfileType, add Endpoint protection.
- Next, proceed to Settings. Select Windows Defender Security Center.
- Click on Tamper Protection. You can choose to turn it on or off.
- Next, assign the profile to the groups.
Conclusion
Enabling and disabling your Tamper Protection can help you customize your Windows Defender Antivirus. Let us know in the comments below if any of these procedures work for you.
if you have problems changing the tamper protection key inside of this tree:
HKEY_LOCAL_MACHINE\SOFTWARE\Microsoft\Windows Defender\Features
then try SAFE MODE to take ownership AND grant your account Full Control
that key is protected and won’t let you change ownership unless you are in Safe Mode!!!