
There will be times when you needed to know the serial number of your computer. Perhaps, you need it to contact support for technical problems, purchase part replacements or you are simply keeping a list of the devices connected in your home network. Sometimes you would also need your PC’s serial number for warranty claims.
You can’t find your computer’s serial number listed anywhere in Windows 10. Microsoft did not bother to put this piece of information in any settings or system information tools. But, there are ways to find it using the command line or right in the computer hardware itself.
How to Find your PC Serial Number using PowerShell
The PowerShell tool can be useful if you want to retrieve a copy of your computer’s serial number. You can do it easily using a command.
- Click on the Start menu.
- Search for PowerShell, right-click on the top result, and select Run as administrator.
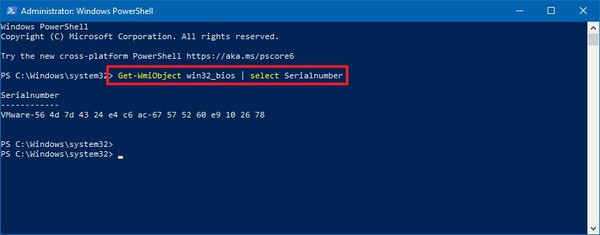
- Type the following command and press Enter:
- Get-WmiObject win32_bios | select Serialnumber
- You can also the following command to determine device serial number:
- Get-CIMInstance win32_bios | format-list SerialNumber
- To export the resulting serial number details to a text file, type the following command and hit Enter:
- Get-WmiObject win32_bios | select Serialnumber > PATH\TO\EXPORT
- Make sure to replace “PATH\TO\EXPORT” with the path where you want to export the serial number information. See example below:
- Get-WmiObject win32_bios | select Serialnumber > C:\MySerialNumber.txt
How to Retrieve your Computer Serial Number using the Command Prompt
You can also use the Command Prompt to check the device serial number for your PC. Follow the following methods:
- Open Start menu.
- Search for Command Prompt, right-click, and select Run as administrator.
- You can also hit the Win + R keys and then type cmd on the Run dialog box.
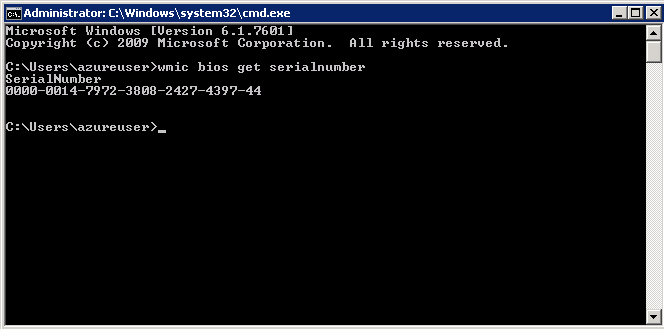
- Then, type this command and hit Enter:
- wmic bios get SerialNumber
- To export the serial number to a text file for easy reference, simply type the following command and hit Enter:
- wmic bios get SerialNumber > PATH\TO\EXPORT
- Don’t forget to replace the “PATH\TO\EXPORT” section with the path to the text file on your computer. See example below:
- wmic bios get SerialNumber > C:\MySerialNumber.txt
Once you complete any of the two methods above, you will now have a copy of your PC’s serial number. You won’t need to reboot your PC and access the BIOS to do it.
Determine the Serial Number on the Hardware or Box
Sometimes you might not be able to open your computer due to errors or any problem that prompted you to contact support or order a parts replacement. If that’s the case, you can try to find the serial number on a sticker at the back of your computer or on the packaging box that it came with.
If you are using a laptop, you might need to remove the battery completely to see the serial number.
You can also try to find the receipt for your purchase if you still have it. More often than not, the serial number is listed on the receipt. If you bought your computer online, there is a good chance that you can find the serial number on the email receipt they have sent you.