
Renaming a file is an easy task. But, imagine the time you need to spend when renaming a lot of files on your computer. Doing it one at a time for multiple files can mean hours of the tedious work.
Now, you can rename multiple files in your Windows 10. Check out the options below.
Renaming Multiple Files in Windows 10
Method #1 – Use the File Explorer

To rename multiple files using the File Explorer, you will need to put all of your files in one folder.
- Open the folder containing all the files that you want to rename.
- Click a file and hold Shift. Drag the cursor up to the last file that you want to rename. This will select all the files.
- Right-click on the files and select Rename.
- Type the new name and press Enter.
- Now, it will rename all the files automatically.
Method #2 – Rename Multiple Files Using the PowerShell
Another way to batch rename files is to use the Windows PowerShell. It is a bit complicated for beginners but some users prefer using the app.
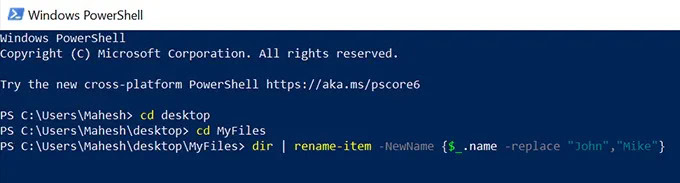
- Open your Cortana Search and look for Windows PowerShell.
- Type cd followed by the path location of your files.
- To rename your files, type the following command: dir | rename-item -NewName {$_.name -replace “A”,”B”}. A is the old name and replaced by the new name B.
Method #3 – Using the Command Prompt
You may be familiar with the Command Prompt instead of the Windows PowerShell. To rename batch files using the Command Prompt, follow the steps below.
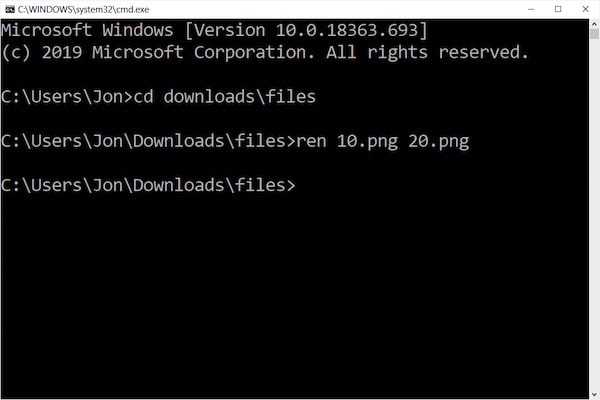
- Using your Cortana Search, open the Command Prompt.
- Type the following command to rename your files: ren . A-B*. The *.* means to select all the files. A is the old name and replaced by the new name B. Add a * to retain the file extension.
- You can also change the extension of the file using the following command: rename *.jpg *.png. jpg is the old extension file replaced to png.
Which method above works for you best? Let us know in the comments below.