
It helps to record meetings on Microsoft Teams to share with participants for further reviews later. Users who failed to attend the video conference can also have the chance to watch the recordings and not miss out on anything important discussed.
Microsoft Teams has a new feature that automatically expires the time of video recording and transcriptions on meetings. By default, Teams meeting recordings expire after 60 days. It only applies if there are no actions done on the video within 60 days, such as no views or clicks.

Each recording file is available for viewing in SharePoint or OneDrive. While it offers benefits for participants, it also takes up storage space. Microsoft Teams set the 60-day expiration period to help users save storage space for more video recordings in the future.
However, if you need to extend the expiry day, you can also do so by setting a different date and time or turning off the expiration setting. There are instances when you have to manage and save the videos for a long time even without activity, especially if it is an important meeting. You can easily change the default expiration time or disable the expiration setting on the Microsoft Teams admin center.
How to Set a Different Expiration Timeline for Microsoft Teams Video Meeting Recording and Transcription
It only takes a few steps to edit the default expiration time for your Microsoft Teams recording and transcription for video meetings. You can follow each of the steps below one at a time to increase the retention period of recordings stored on your account.
- To stop Teams meeting recordings from expiring, first, go to admin.teams.microsoft.com on any web browser on your preferred device.
- Login to your Microsoft Teams account.
- Go to the left panel and click the drop-down arrow next to Meetings.
- Choose Meeting Policies.
- Click Add.
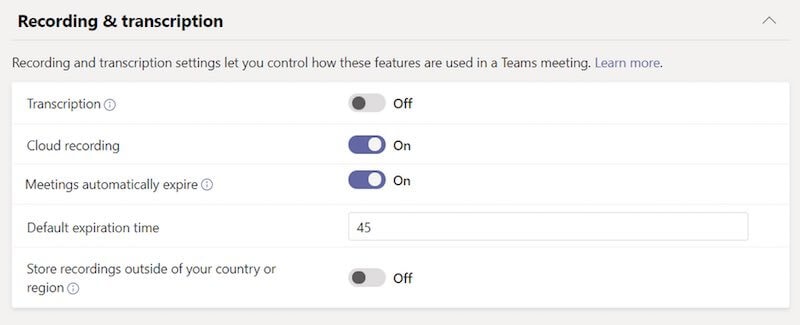
- Go to the right panel and navigate to Recording & transcription.
- If you want to turn off the default expiration setting, go to Meetings automatically expire and toggle the button to Off.
- If you want to extend the default expiration timeline, go to Default expiration time and set the number of days that you prefer.
In Closing
That’s it! Now, you can retain your recording files on Microsoft Teams or not. What number of days do you prefer as default for the recordings’ expiration time? We are curious to know your answer! You can write it in the comment section below.