
There are instances when you experience lagging and slow performance on your Windows 10 or 11 PC system. Memory-related issues are within your physical RAM or Random Access Memory. But, there is also a hidden yet reliable tool that Windows is using to help your PC run faster.
The Virtual Memory on your Windows PC helps in keeping up with your usage and needs. While RAM is where all the active programs operate, Virtual Memory is where inactive programs are set to go until they become active again. This is what Windows calls Page Filing.
When you use a program, it needs a certain amount of RAM. In order not to exhaust and lift some of the load off on RAM, Windows uses Virtual Memory to store programs that are not yet being used. That way, your computer performs better and will not run out of available memory.
However, there are also cases when your Virtual Memory ran too low. It will cause your system to perform less and sometimes prevent apps from loading properly. What you can do is reset or change your Virtual Memory to increase its allocation.
Steps to Reset or Change your Virtual Memory to Default Settings on Windows 10 or 11 PC
Below you can find the method of how you can reset or change the virtual memory of your Windows 10 or 11 PC back to its default or recommended settings. Follow each of the steps one at a time.
- Launch the Settings menu of your Windows 10/11 PC.
- Go to System.
- Select About.
- On the further right section, look for the Related settings option.
- Under it, click System info.
- On the left side, click Advanced system settings.
- Navigate to the Advanced tab.
- Go to Performance.
- Click Settings.
- Navigate to the Advanced tab again.
- Go to the Virtual Memory section.
- Click the Change button.
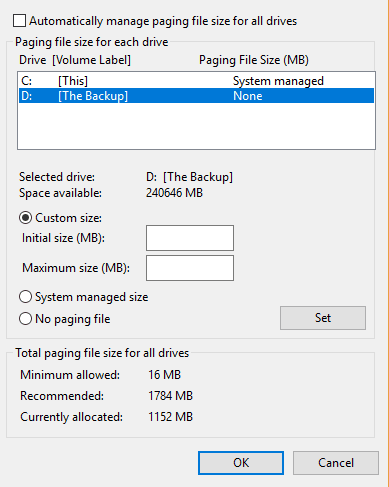
- Look for the Automatically manage paging files size for all drives and uncheck the box.
- Scroll down and check the box next to No Paging File.
- Click the Set button.
- Click Yes.
- Click OK.
- Restart your computer.
- After rebooting your PC, navigate again to the Virtual Memory window by following the steps above.
- This time, check the box next to the Automatically manage paging files size for all drives option.
- Click the OK button.
- Restart your computer.
Wrapping Up!
That’s it! Now, your Windows 10/11 PC operating system will run faster and perform better with a fresh Virtual Memory in its arsenal.
How was your experience after resetting your virtual memory to default settings? You can share your thoughts and recommendations with us in the comment section below.