
Google Drive is a cloud-based storage that allows you to upload files from your local storage. It is helpful if you want to declutter and free up some storage space in your smartphone or your computer. Google Drive also allows you to access these files on any device as long as you log in to your Google account.
All of the files and folders you create are automatically set under your ownership. It means that you are the owner of the documents you create or uploaded on Google Drive. But, if you decide to let go of these files and folders and give the rights to someone else, you can change the ownership or transfer it to another user without deleting them from your Google Drive.
Note that transferring the file ownership to another person will revoke your right to edit it. It means that the new owner can now make the changes and can set if you are a Viewer, Commenter, or Editor. You cannot make the changes by yourself anymore. You cannot simply add another user as co-owner since Google does not allow multiple ownerships of files. So, before transferring ownership of your Google Drive files to another user, make sure you understand what you are giving up.
These files can include Google Docs, Google Sheets, Google Slides or Forms as well as third-party documents, images and other items you upload to your account.
Steps to Transfer File or Folder Ownership in Google Drive
If you want to transfer or change the ownership of your documents, images, videos, files or folders on Google Drive, follow the steps below.
- On your browser, go to Google Drive.
- Sign in to your Google account, if necessary.
- Look for the file or folder that you want to transfer ownership of.
- Open the file.
- On the top right side, click the Share button.
- If you haven’t shared the file to the person you want to transfer ownership to, add his or her email address.
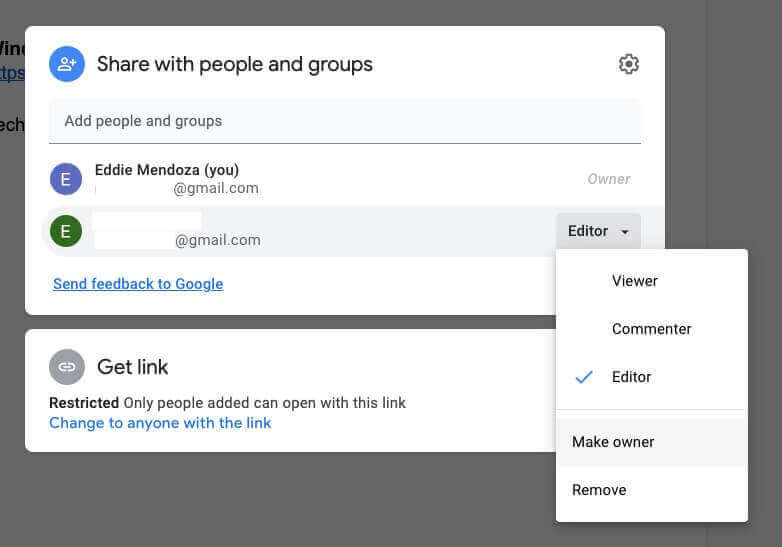
- Go to the email address of the person you want to make the new owner.
- Click the drop-down arrow next to it.
- Select Make owner.
- A confirmation message will appear.
- Click Yes.
- Click Done.
That’s it! The new owner can also do the same process if he or she decides to transfer the ownership back to you or another person.
What are your reasons for transferring some of your files to another person? We would love to hear more about them. You can drop us your comment below.