
It is always a challenge for users to work on both Windows and Apple devices. Sharing and syncing files and other contents are not as easy but are sometimes essential. Now, you can set up and access your iCloud Notes on your Windows 10. You can share files and photos between your Windows computer and Apple devices. Check out the article below.
Setting Up the iCloud App on Windows 10 PC

- Got to Microsoft.com and search for iCloud for Windows.
- Download the app and install it on your computer.
- After the process is done, restart your computer.
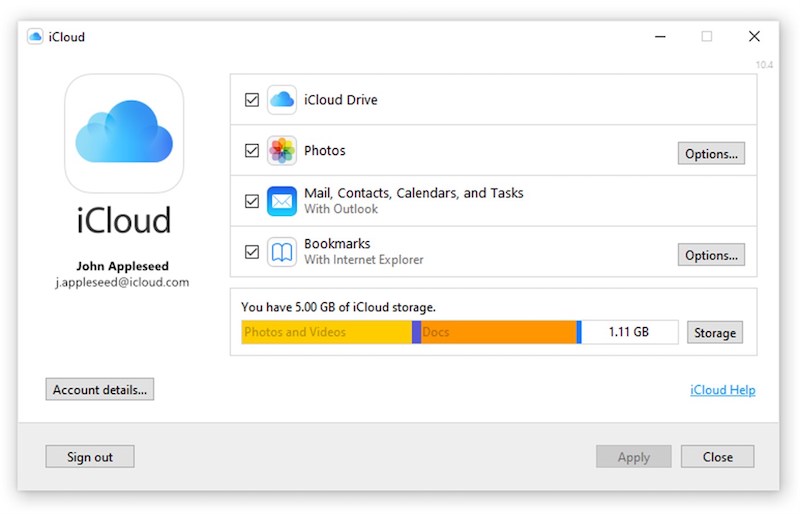
- Launch your iCloud for Windows.
- Sign in your Apple ID.
- You will see the list of contents available on your iCloud.
- Select the contents that you want to update on your devices.
- Click Apply.
How to Use Apple’s iCloud Drive on Windows
With the iCloud for Windows, it is easy for you to download and share your photos. You can access your iCloud photos from your Windows computer. Click the iCloud icon and select Download Photos.
The iCloud for Windows will create the iCloud Photos where you can access all your photos and videos. You can add images and video files on your iCloud Photos folder from your computer. Then, you can see them on your Photos app using any Apple device or on iCloud.com.
It is also easy to share your photos and videos with other people through the Shared Albums.
The iCloud for Windows app also allows users to check their files and folders in iCloud Drive. You can create files from your computer and save them to your iCloud Drive. Access these files in any of your devices. Plus, you can also share them with other people.
Alternative Ways to Access iCloud Notes On Windows 10
If you do not want to use iCloud for Windows, there are also other ways to access your iCloud Notes.
Via iCloud Notes Web App

You can access your notes on your computer through the iCloud Notes web app.
- On your browser, go to iCloud.com.
- Sign in your Apple ID and enter an authentication code, if needed.
- Look for the Notes app and click to open.
- Now, you can access your notes from your iPhone or iPad devices.
Make sure to turn on iCloud Sync on your iPhone when using this method. To do so, go to your iPhone Settings. Click Apple ID and go to iCloud. Enable sync on the Notes app.
Use a Progressive Web App
You can also use iCloud Notes as a Progressive Web App (PWA) on Windows 10.
- On your Google Chrome or Microsoft Edge Chromium, go to iCloud.com.
- Sign in your Apple ID and check the Keep me signed in checkbox.
- Click Trust.
- Look for the Notes app and click to open.
- On the upper right side, click Chrome’s menu icon.
- Click More Tools.
- Select Create Shortcut.
- When a pop up window opens, check the Open as window option and click Create.
- You have now created an iCloud Notes shortcut on your computer’s desktop.
Through Your Gmail
Sync your iCloud Notes app on your Gmail to access its contents. However, you can only access the new notes that you created using the Gmail app and not your old notes.
- On your Apple device, go to Settings.
- Select Passwords & Accounts.
- Click Gmail.
- Look for Notes and toggle the option to Enable.
- Now, you will see a Notes folder under Gmail in your Notes app.
You can try using any of the methods above, or you can experiment on all solutions to see which ones work for you best. Let us know the best results for you by dropping us a comment below.