
Knowing your enemy is one of the best defenses you can do in battle. We may protect ourselves but it offers an advantage if we know who we are fighting against. Microsoft gives its users a protection tool called the Microsoft Defender Antivirus inside the Windows Security app. It is considered as one of the reliable antivirus software that protects our devices from viruses and all other kinds of malware.
But, did you know that Microsoft Defender Antivirus has a protection history tool? It is an added feature that provides its users with a history report of what malware was removed and cleaned. You can also see blocked actions made the antivirus.
The purpose of this history report is to let you know what threats were found on your computer and the course of action the Microsoft Defender Antivirus did to fix the problem.
How to View Malware Protection History in Microsoft Defender Antivirus on Windows 10
If you want to view the Malware Protection History in Microsoft Defender Antivirus in your Windows 10 PC, check out the steps below.
Via Windows Security
- On your Windows 10 computer, click Start.
- On the search box, search for Windows Security. A new window will open.
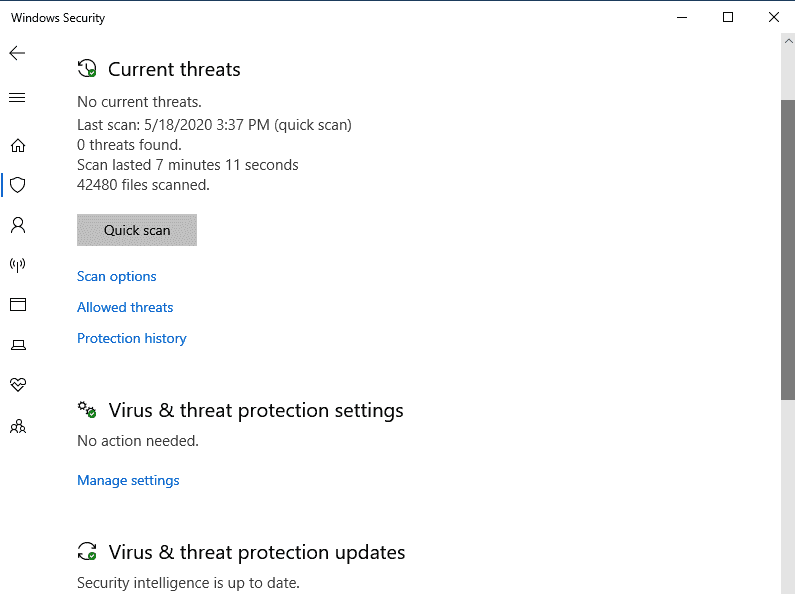
- Click the Virus & threat protection on the left side.
- Look for Current threats.
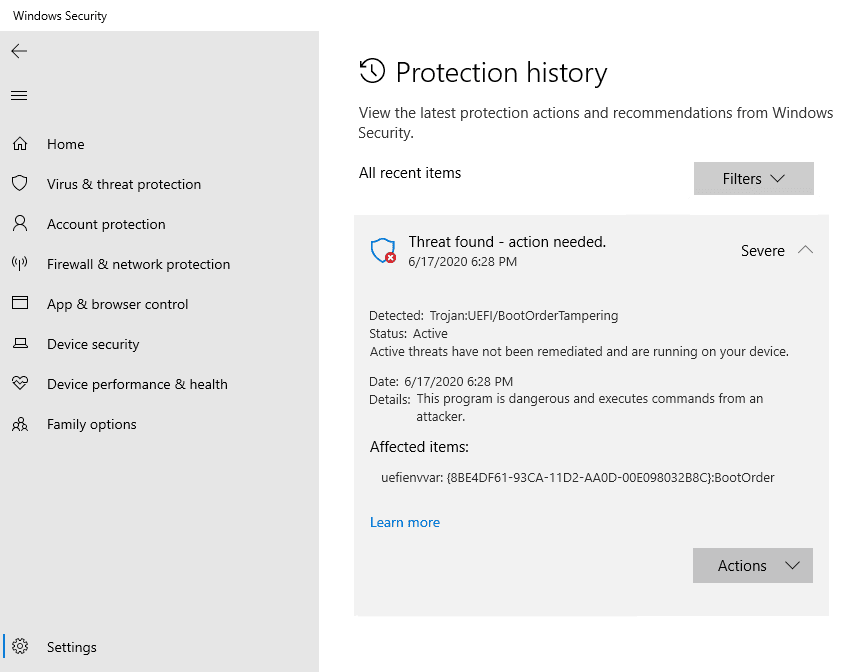
- Under it, click Protection history to open.
- You will see a list of the threats found by the Microsoft Defender Antivirus. If you want to sort the list, click the Filters. You can choose based on Recommendations, Quarantined items, Cleaned items, Blocked actions, and Severity.
- If you want to see more details about each threat, click on an item. It will show the type of malware, the status, date when it was found, details, and the affected items.
Via PowerShell
Another way to view the protection history is through PowerShell.
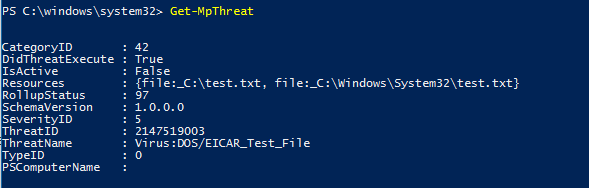
- Search PowerShell on Start and select Run as administrator.
- Type Get-MpThreat and hit Enter.
- Now, you can see a list of the threats found by the Microsoft Defender Antivirus.
- If you want to see the malware detections that are active and in the past, type Get-MpThreatDetection in your PowerShell.
That’s it! Either of the two ways can help you see the history detections of your Microsoft Defender Antivirus. Was the article helpful? Let us know in the comments below.