
Windows 10 is the most popular computer operating system for Windows-only machines in the world right now. According to U.S analytics vendor Net Applications, 72.2% of Windows-only machines in the world are currently using Windows 10.
It is also important to note that the 5-year-old operating system will be the last of its own as Microsoft decided to follow the Apple approach. Instead of releasing an entirely new version of the operating system every few years, Microsoft is pushing newer versions of Windows 10 each update period. In other words, Windows 10 is an “in-progress” operating system, and it may take a few more years to perfect each corner.
With that said, it is very common for Windows users to encounter issues along the way. Thankfully, most of these issues can be easily fixed without sending your computer for an expensive repair job. Most of the common ones are the issue with charging. Despite being plugged in, some of the users are just unable to charge their Windows 10 computers.
In this article, we will help you fix the ‘plugged in not charging’ issue which, fortunately, is 99% just related to some software glitches. However, if the battery icon is missing from your Windows 10 taskbar, then it’s a different issue.
How to Troubleshoot Issue and Fix Windows 10 Plugged in Not Charging Error

There are many reasons why your Windows 10 computer may have just stopped charging. It can either be a result of a faulty cable, perhaps port issues, but most of the time, just some weird software bug in Windows 10. The following steps will guide you through many methods on how to resolve this glitch.
Solution 1: Check Power Adapter and Battery
Before you tweak some things in your operating system, it is highly advisable to check the hardware first to narrow down your problem areas. We don’t want to mess up some things in your operating system, then later realize that it is the power adapter with some issues.
Do the following checklist first:
- Check if your AC outlet is working properly. Not sure? Try plugging in the power adapter on a different outlet.
- Check if the power adapter is firmly inserted in the power outlet.
- Check if the power adapter is firmly inserted on your Windows 10 computer.
- Inspect for any possible problems with the power adapter cable.
- Removable battery? Check if there is any smudge on the contact points.
- No smudge? Don’t insert back the battery. Hold the power button for about 10-15 seconds to drain all the residual power from the computer components.
- Now, before you insert back the battery, plug in the power adapter. Computers will work just fine without a battery as long as the power adapter is inserted.
- Is it turned on? Then there is no issue with your power adapter.
- Now, put back in the battery and turn on your computer. Plug in the power adapter to check if your computer is charging.
If it works fine then Great. If not, proceed to the next solution.
Solution 2: Run the Power Troubleshooter
Now that we have confirmed that there is no problem with your power adapter and battery, we may now tweak some settings on your Windows 10 computer. Don’t worry, we made all the steps easier for you. In this part, we will try to fix the issue by running the Power Troubleshooter.
- Press the Windows key on your keyboard to launch the Start menu.
- Click Settings, then look for Update & Security.
- Under Update & Security, look for Troubleshoot. It is usually in between the Backup and Recovery menu.
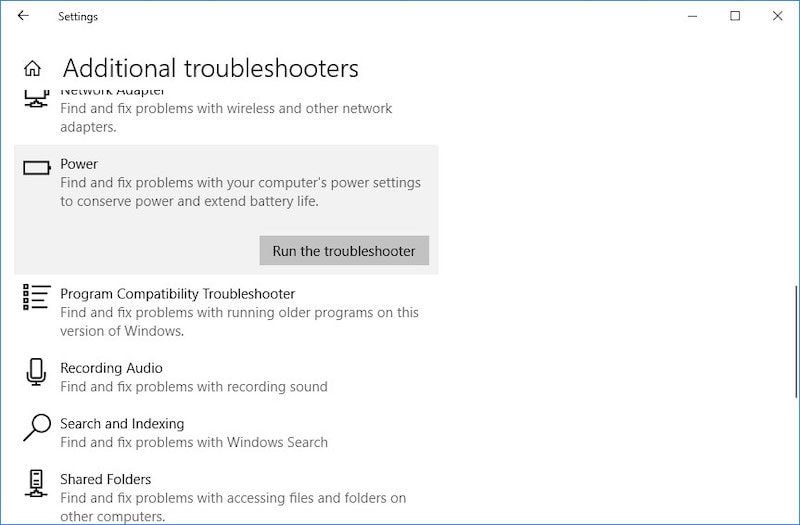
- Go to Additional troubleshooters and scroll down the bottom, and look for the Power section. In that same section, you will see a button that says “Run the troubleshooter”.
- Follow the on-screen directions, then restart your Windows 10 computer.
This should be able to fix the “Windows 10 plugged in not charging” issue. If not, proceed to the next solution.
Solution 3: Restore Default Power Setting
If running a power troubleshooter didn’t work for you, then perhaps we may need to restore the power settings on its default configuration. This is one of the easiest solutions in this article, and there are two ways to do this.
Via Change Plan Settings
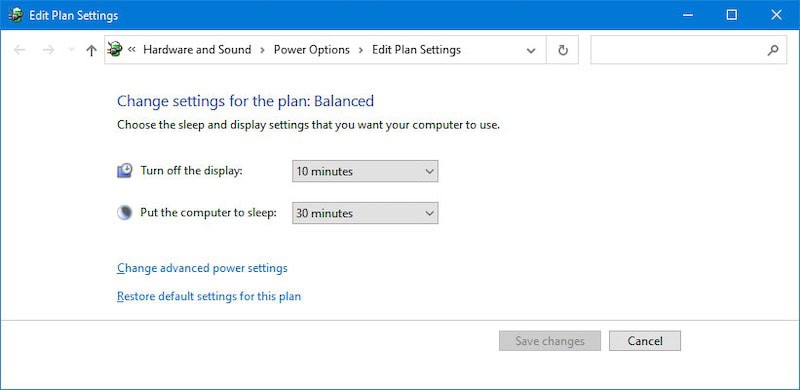
- Type the word “power” on the search box beside the Windows Start logo, then click on “Edit power plan”. Alternatively, Go to Settings > System > Power & sleep > Additional power settings > Change plan settings.
- At the bottom of the tab, you will see “Restore default settings for this plan.” Click on that; then there should be a pop-up prompt.
- Click on “Yes” to continue.
- Restart your computer.
Via Command Prompt
- Search for “Command Prompt” in the search box.
- Inside the Command Prompt, type in powercfg –restoredefaultschemes then press the Enter key. It will reset your computer to its default power setting.
- Exit the Command Prompt, then restart your computer.
Solution 4: Update or Reinstall Battery Drivers
If none of the solutions above worked for you, then we may have to update, perhaps even uninstall and reinstall the battery drivers on your computer. This solution often fixes the “plugged in not charging” issue on Windows 10.
- Press the Windows key and X simultaneously to launch a small menu on the screen’s left side.
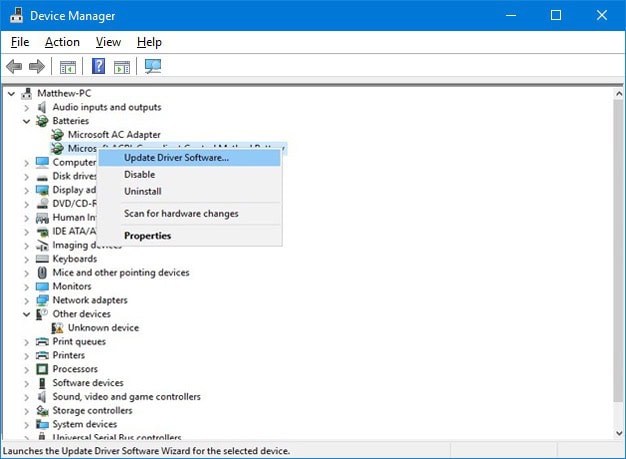
- From the list, choose Device Manager, then click on Batteries.
- Now, right-click the Microsoft ACPI-Compliant Control Method Battery, then try to update it. If the update is successful, restart your computer. If no update is available, right-click again and Uninstall the device.
- There will be a pop-up prompt, click on Uninstall to confirm the process.
- Now, from the icons above, Select “Scan for hardware changes”.
- From there, select Batteries, then right-click on “Microsoft ACPI-Compliant Control Method Battery”.
- Select Update Driver Software.
- When a new window pop-up, click “Search automatically for updated driver software”. Windows 10 will automatically search and install the most suitable battery driver for your computer.
Solution 5: Perform a Power Reset
Now, we have come to the last part of the article, performing a power reset. Notice that we have done this method in the first part of the article. The only difference is that we have already made efforts to tweak some stuff in the Windows 10 Settings. Perhaps, another power reset will finally resolve the “plugged in, not charging” issue.
- Press the Windows key, then click on Power to Shutdown your computer.
- Unplug your AC adapter, and then remove the battery.
- Press the Power button for approximately 10-15 seconds. This should drain all the remaining batteries from all the capacitors and other components.
- Now, plug back in the battery, and connect your computer to the AC adapter.
- Turn on your computer to check if this resolves the issue.
Solution 6: Call a Tech Support
Since we don’t know where the issue is coming from, it is best to contact Microsoft-certified tech support for assistance. Beware though as there are many scam tech support online. So make sure you contact the official tech support.