
When opening a website on your Chrome browser, you may encounter the error message, “Not enough memory to open this page.” It means that your computer ran out of memory, not enough for Google Chrome to display the webpage you are trying to access.
There may be different reasons why the RAM crash issue appears on your Google Chrome browser in Windows 10. Still, there are also ways to troubleshoot and resolve the PC memory problem so you can go back to your browsing in no time.

Ways to Repair Not Enough Memory to Open This Page Google Chrome Error on Windows 10
Not all solutions work for everyone. You can try to follow each method below one at a time and then check if you can now open the website you want to browse on Chrome. If not, move on to the next solution until you resolve the browser issue.
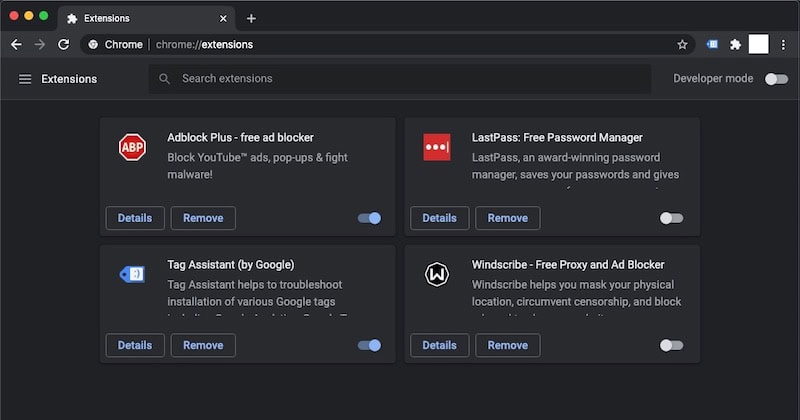
#1 – Disable Google Chrome Browser Extensions
- On your Google Chrome browser, click the menu button.
- Select More tools.
- Choose Extensions.
- Now, you can try to disable a few extensions at a time.
- After turning off your extensions, restart your browser.
#2 – Terminate Other Programs Running in the Background
Some apps in the background may be taking up more of your RAM. Launch the Task Manager on your PC and check processes that are taking up memory. Click the End Task button for these programs.
#3 – Remove or Close Some of your Unused Browser Tabs
Are you parking a few tabs on your Google Chrome browser? These are also using up memory that you might need to load your website. You can take note of these websites and exit them to free up precious RAM on Windows 10.
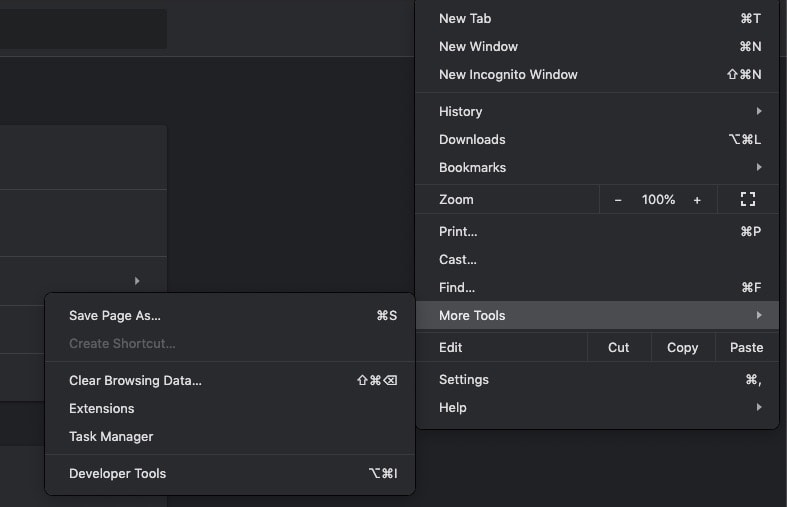
#4 – Clear Google Chrome Cache
- On your Chrome browser, click the menu button.
- Go to More tools.
- Select Clear browsing data.
- Set the Time Range to All time.
- Check the boxes next to Cookies and other site data and Cached images and files.
- Click the Clear data button.
- Restart your Chrome browser.
#5 – Expand Chrome’s Page Filling on Windows 10
- Launch the Control Panel.
- Go to System and Security.
- Select System.
- On the left side, click the Advanced system settings.
- On the System Properties window, navigate to the Advanced tab.
- Under Performance, click the Settings button.
- Go to the Advanced tab.
- Click the Change button.
- Look for the Automatically manage paging file size for all drives. Uncheck the box.
- Next, select Custom size.
- In the Initial size option, enter the figure you see below next to the Recommended option.
- You can also do the same with the Maximum size or enter a higher value.
- Click the Set button.
- Click OK.
#6 – Disable Hardware Acceleration on Chrome
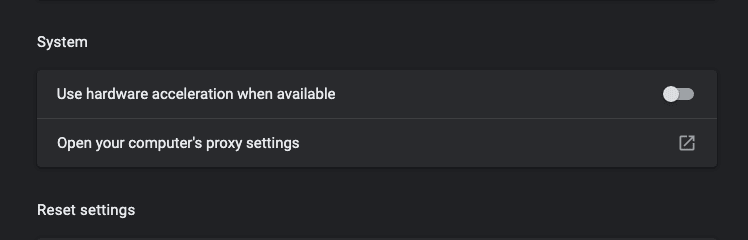
- Navigate to the Settings menu. You may also enter chrome://settings/.
- Select Advanced.
- Go to System.
- Look for Use hardware acceleration when available.
- Toggle it to Off.
Which of the solutions above helped you fix your Chrome memory error on PC? You can let us know your thoughts by dropping us a comment below.