
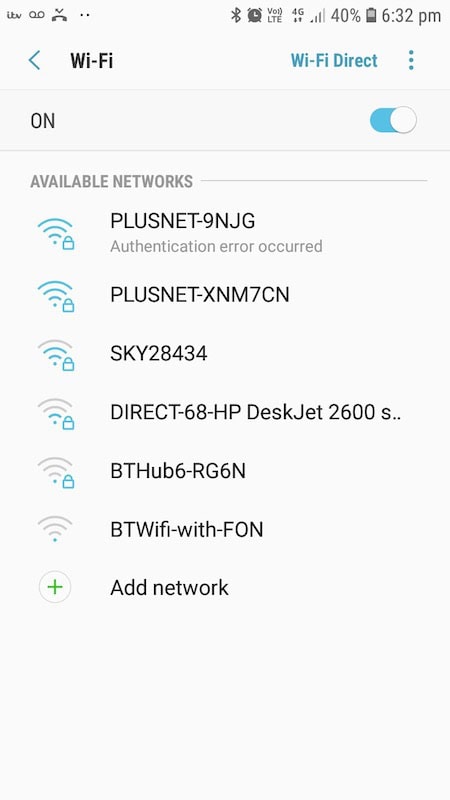
A lot of users encounter the WiFi authentication error on their Android phones. It can be frustrating to see the error message when you want to use the Internet on your mobile device.
There are various reasons why you see the network connectivity issue on your phone. One is when you enter the incorrect password for your WiFi. Another reason is due to your network settings or your IP address.
How Do I Fix Android Authentication Problem with WiFi?
If you are experiencing the Wifi authentication error now, there are ways on how you can fix the issue on Android.
Solution #1 – Reenter Your WiFi Password
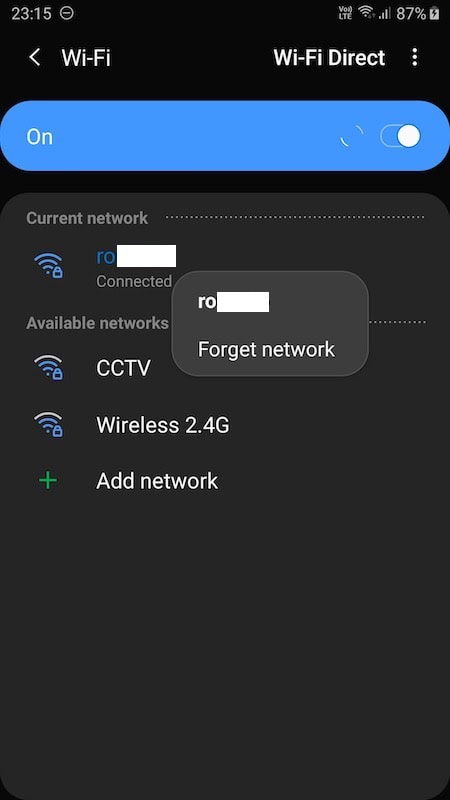
You may have entered the wrong password for your WiFi network. To make sure you do, reenter the password. This time, click the Show Password icon to let you see if the characters are correct.
- To reenter your WiFi password, you need to forget the network first.
- Navigate to the Settings of your Android device.
- Go to WiFi.
- Look for your WiFi connection. Long press on the name until you see a small menu.
- Select Forget Network.
- Wait for a few minutes.
- Now, connect to your WiFi network again.
Solution #2 – Use the Airplane Mode
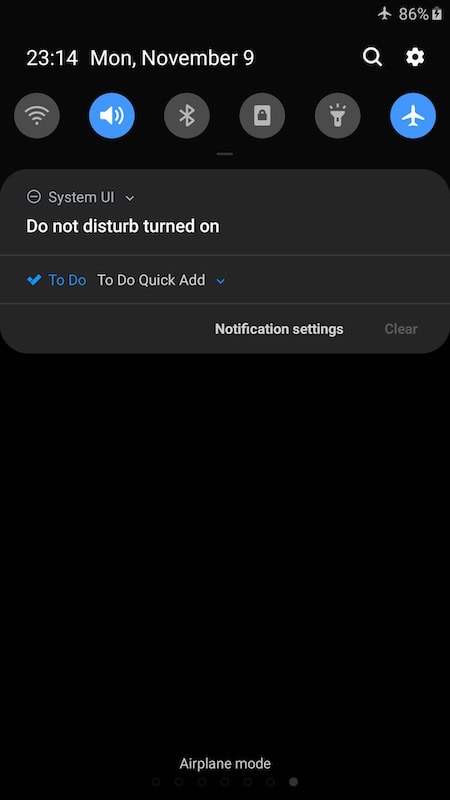
The airplane mode temporarily turns off all network connections to your device. When you turn it on, it will help refresh the connection on your mobile phone.
- Go to the main screen of your Android device.
- Swipe down to open the notification bar.
- Tap the WiFi network to turn it off.
- Tap the Airplane/Flight Mode.
- Tap the WiFi network again to turn it on.
- Once you have connected to the Internet, you can turn off the Airplane mode.
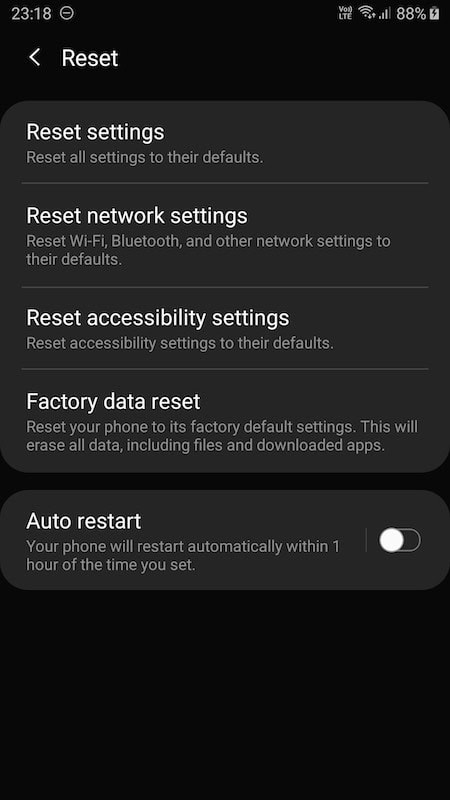
Solution #3 – Reset Your Network Settings

Credit: Windows Dispatch 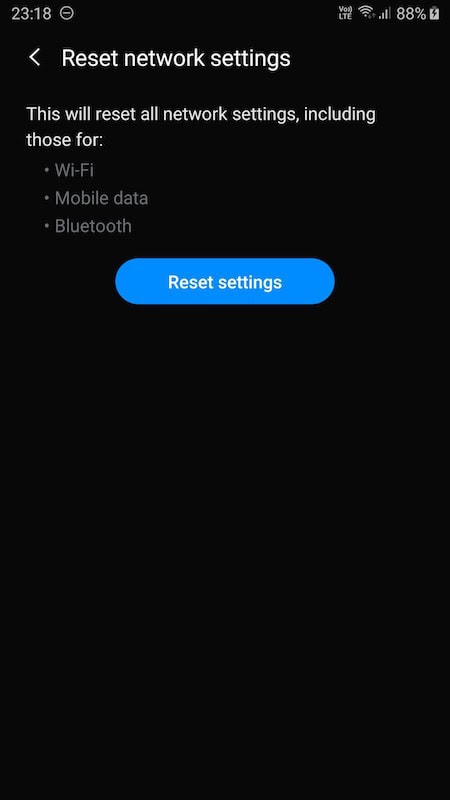
- Open the Settings menu of your device.
- Select Backup and Reset.
- Look for Reset Network Settings and tap to open.
- Tap Reset Settings.
- Once you have reset the settings, reconnect to your WiFi connection.
Solution #4 – Modify Your IP Address
- Open the Settings of your device.
- Go to the WiFi option.
- Tap on your WiFi connection.
- Select the Modify network.
- Go to IP settings. If you cannot see it, tap the Show Advanced Options first.
- Select Static.
- Go to the IP address and copy the information.
- Now, erase the IP address and paste the copied information. It must be the same data.
- Tap Save.
Did the article help you? Tell us in the comments below.