
When you are saving a Word document, a PowerPoint presentation or an Excel spreadsheet file you created using your Microsoft Office app on PC, it saves a lot of time and effort on your part if the save location is the right folder. All it takes is to click the Save button, and it is done since Microsoft Office apps can retain last used path to location for saving files in Windows 10.
But, if you happen to create several files and save them in a different folder, you may want to change your Microsoft Office default save location first. The main advantage is for you not to edit the location each time you have to save a file. One process of changing the autosave folder will make the task less tedious.
How to Set a New Default Autosave Location For Microsoft Office on Windows 10
You can do the process below using any Microsoft 365 apps. You may choose Microsoft Word, Microsoft PowerPoint, or Microsoft Excel.
- Launch any Microsoft 365 app.
- Open any file that you want to save.
- Select File.
- At the bottom, click Options.
- Click Save.
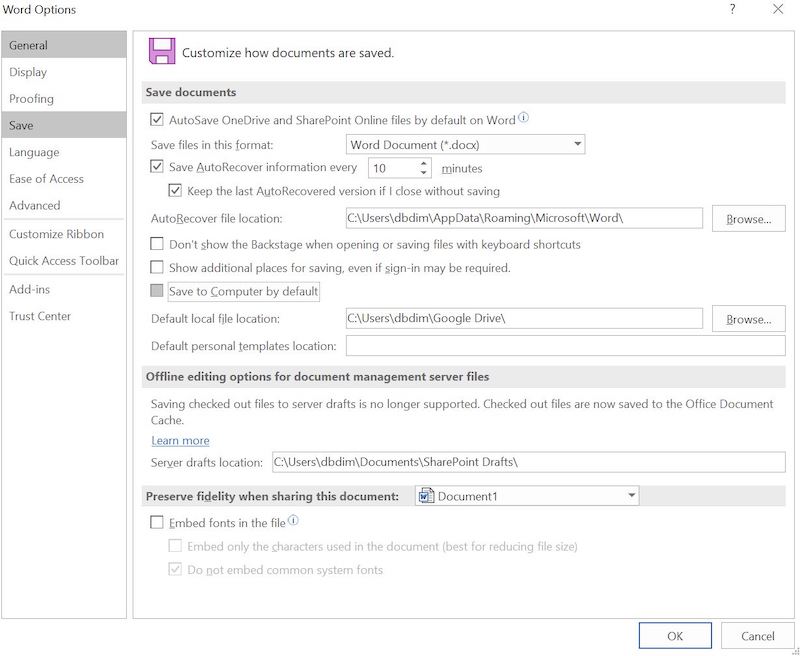
- Look for the Save Documents section.
- Go to Save to Computer by Default and check the box next to it.
- Next to the Default local file location, click Browse.
- Select the folder or location that you want to save your files.
- Click OK.
Now, all your Microsoft 365 apps will apply the same default save location. In most cases, Microsoft’s default save location is your OneDrive. However, when you want to save your files in your local drive or other cloud storage solutions like Dropbox or Box, you can set them to any folder found on your computer.
How to Manually Save a Microsoft Office File to a Different Folder
Note that you can still change the save location of your files even after setting the default folder. You can edit it manually by following the steps below.
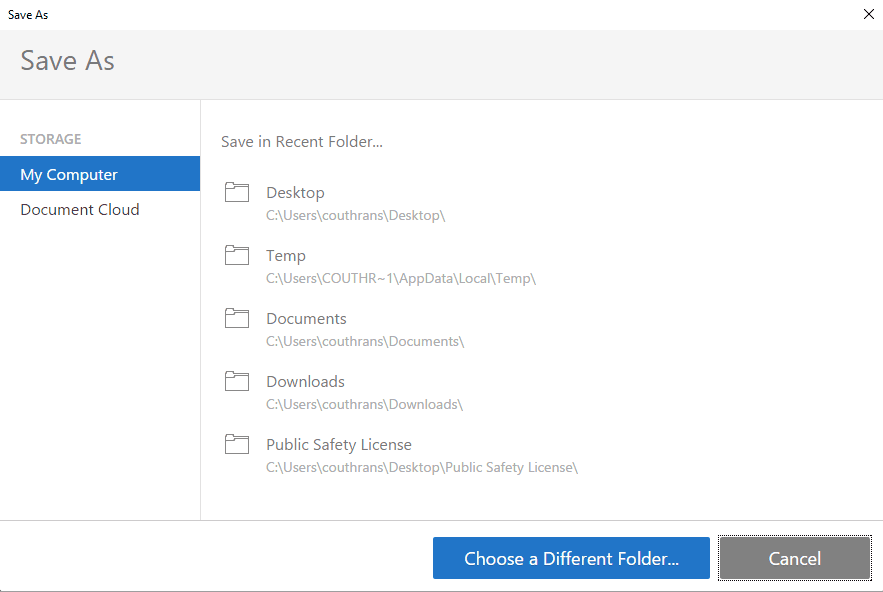
- Open the file that you want to save to a different folder.
- Click File.
- Select Save As.
- Now, look for the folder where you want to save your file.
- Click the Save button.
Wrapping Up!
That’s it! Now you have the option where you want to save some of your files. Which default save location do you prefer for your Microsoft 365 files? On OneDrive or your local drive? We value your opinion, and we would love to hear your thoughts. Kindly write them down in the comment section below.